Introduction
It's purpose
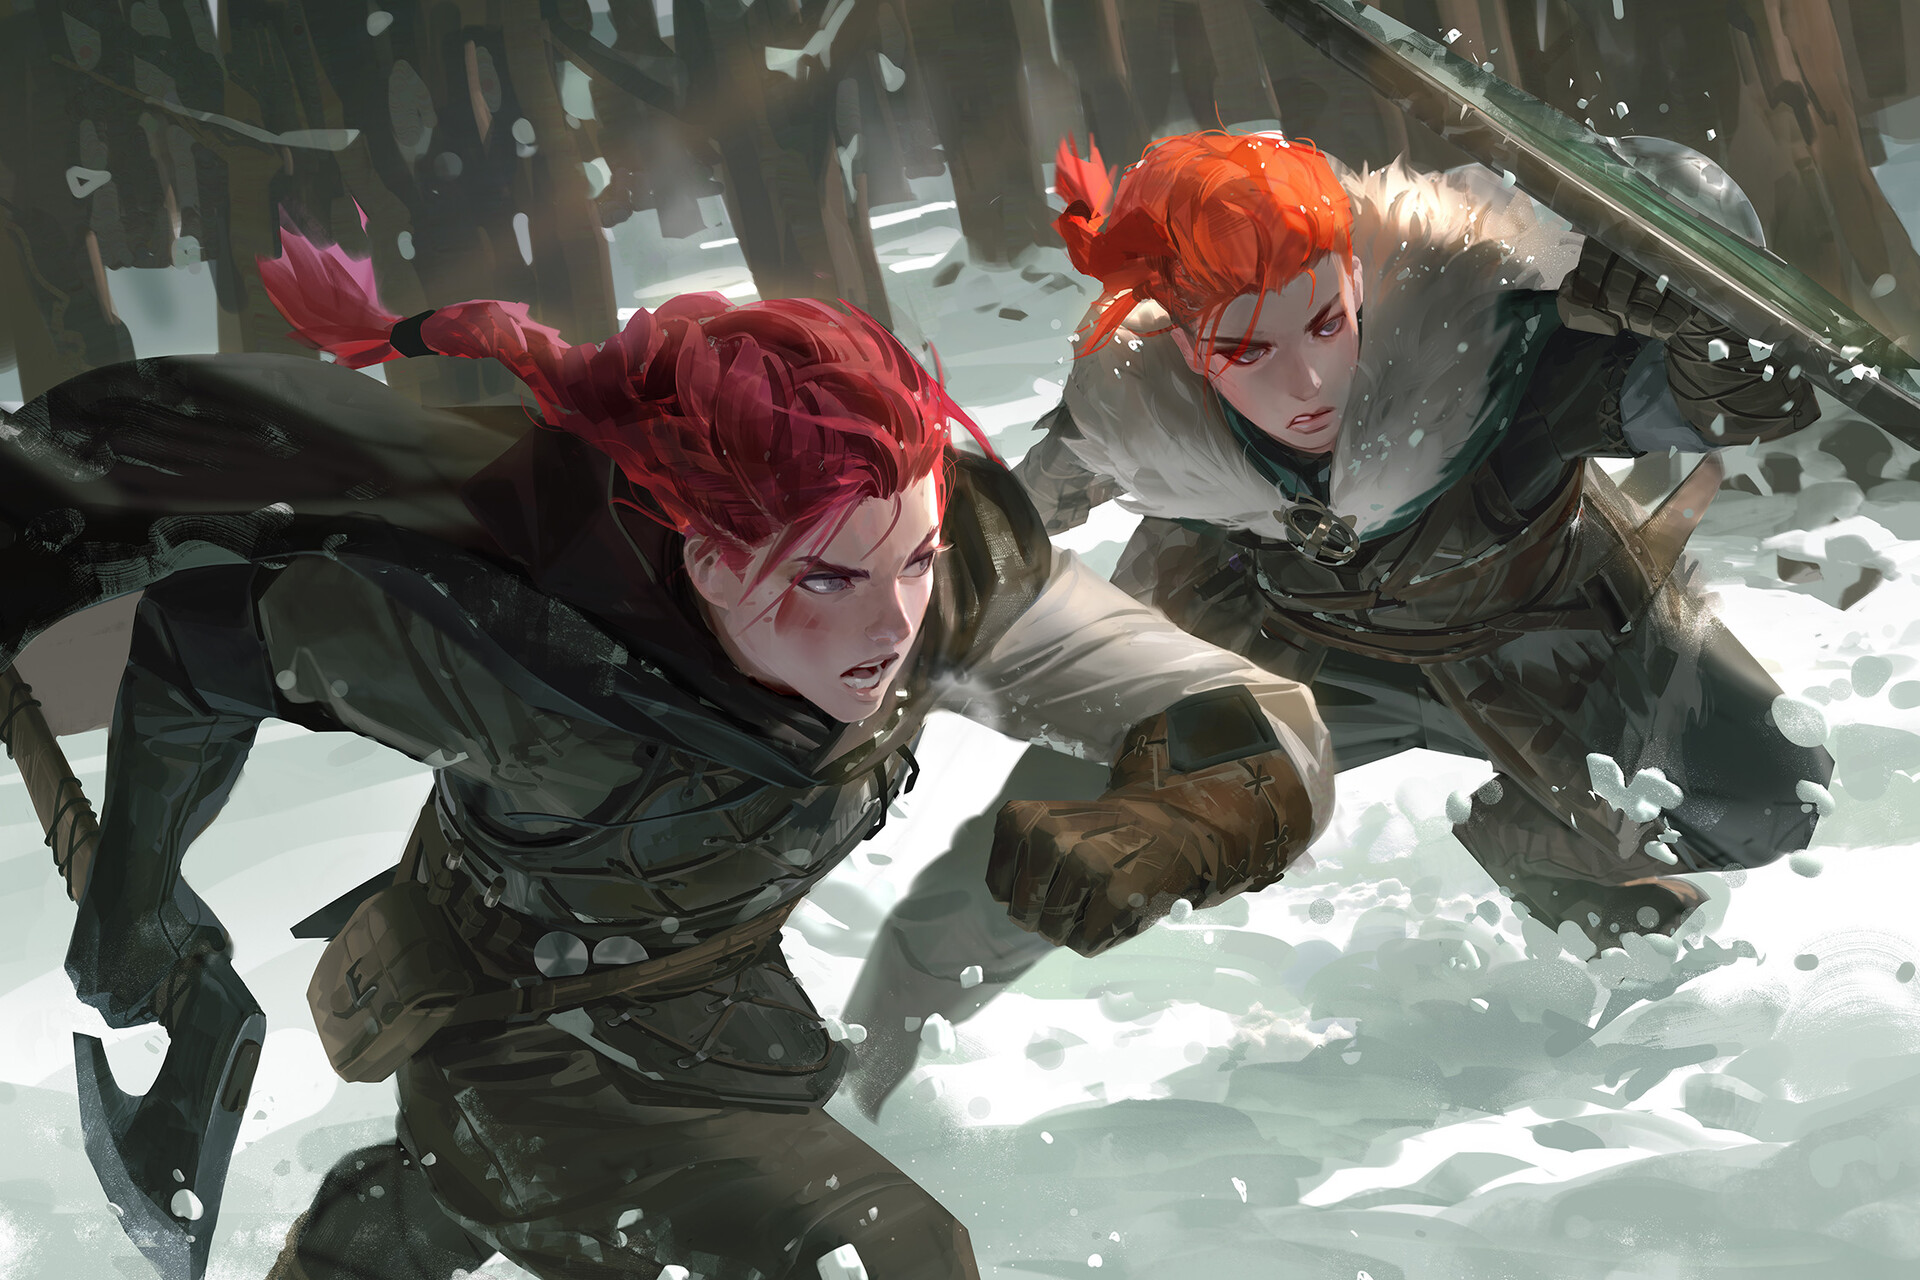
With this tool, you’ll be able to create your own animated token by using your favorite artist’s splash-art or topdown token and adding multiple animated effects to it.
To keep in mind :Before sharing a Token created with this tool, be absolutely sure the license of the original artwork allows you to do so. When in doubt, please don’t share it.
If the license permits it and even when it isn’t required, the etiquette would be to always credit or mention the Author where you can.
Also, we don’t provide a commercial license for the assets provided in this tool as of yet, so any token created with this tool can’t be redistributed as part of a commercial endeavour.
For more details, see this section
List of resources for Top-down Tokens
Here is the list of creators providing topdown tokens. It is non-exaustive, please contact us on discord if you want us to add your favorite Creator to the list.
Note : Webp format isn’t compatible with Blender.
Creating your own Top-down Token.
Videos have no sounds and we made for a user on our Discord Server. If there is anything you don’t understand, feel free to ask !
I made a little mistake, my token should face the bottom of the screen instead of the top.
Installation
- You need to install Blender first if not already done.
- Then download the archive. It contains the entire tool. You don’t need anything else.
- Extract the archive in your prefered location on your computer.
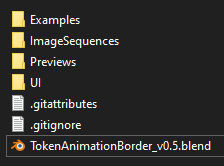
- Inside the archive you should see something like this :
Things to know before the start
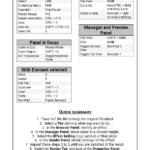
For those who wants to keep it simple, I did a simple Cheat Sheet with only the necessary shortcuts when using the Tool.
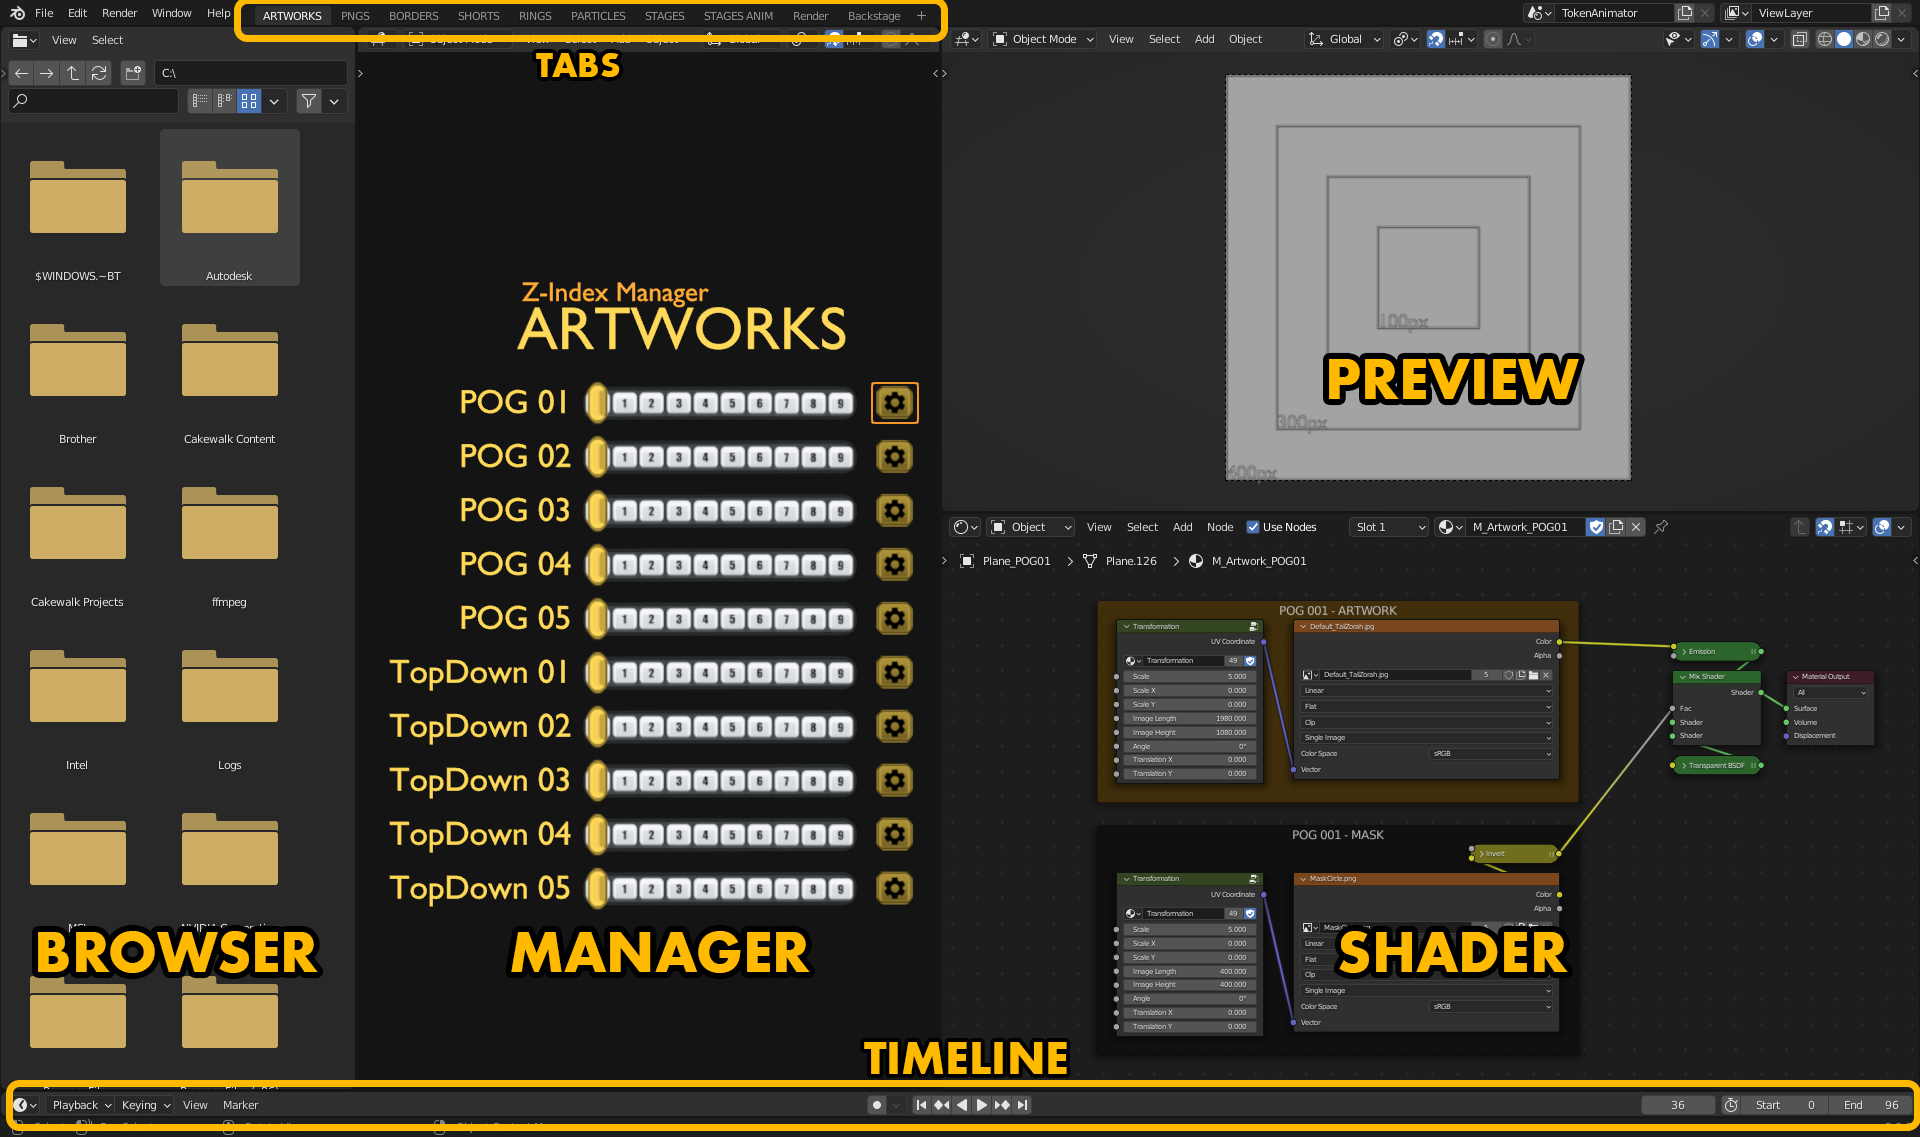
The User Interface
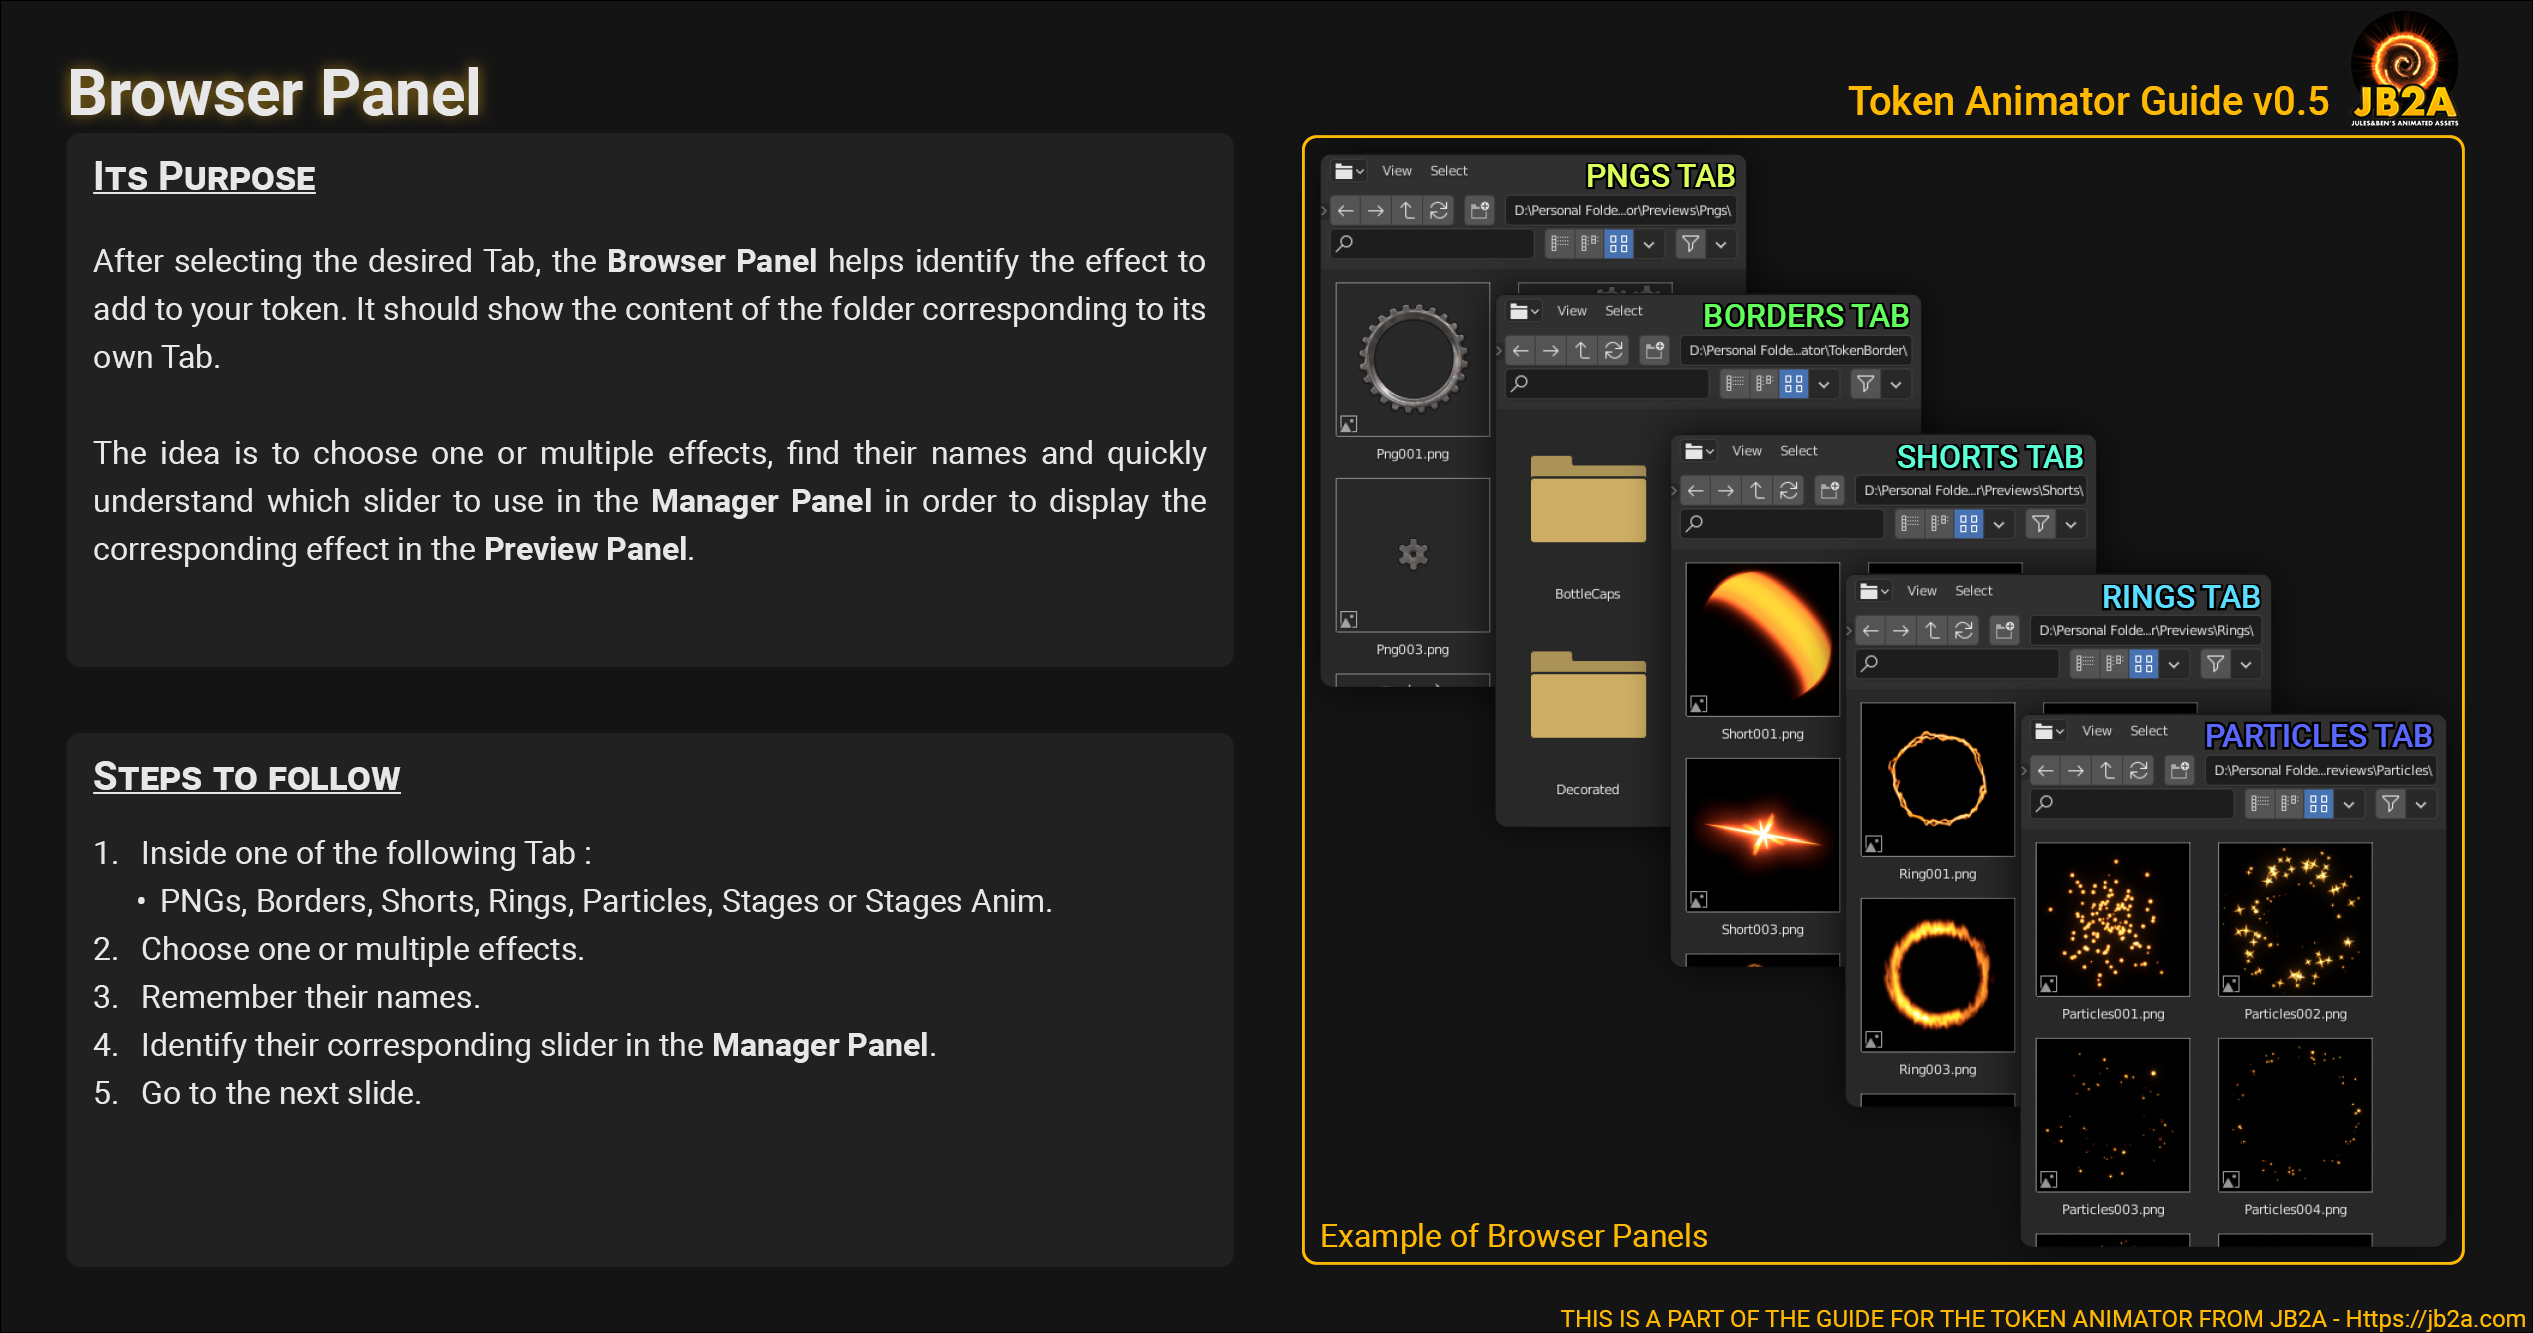
Browser Panel
Tabs
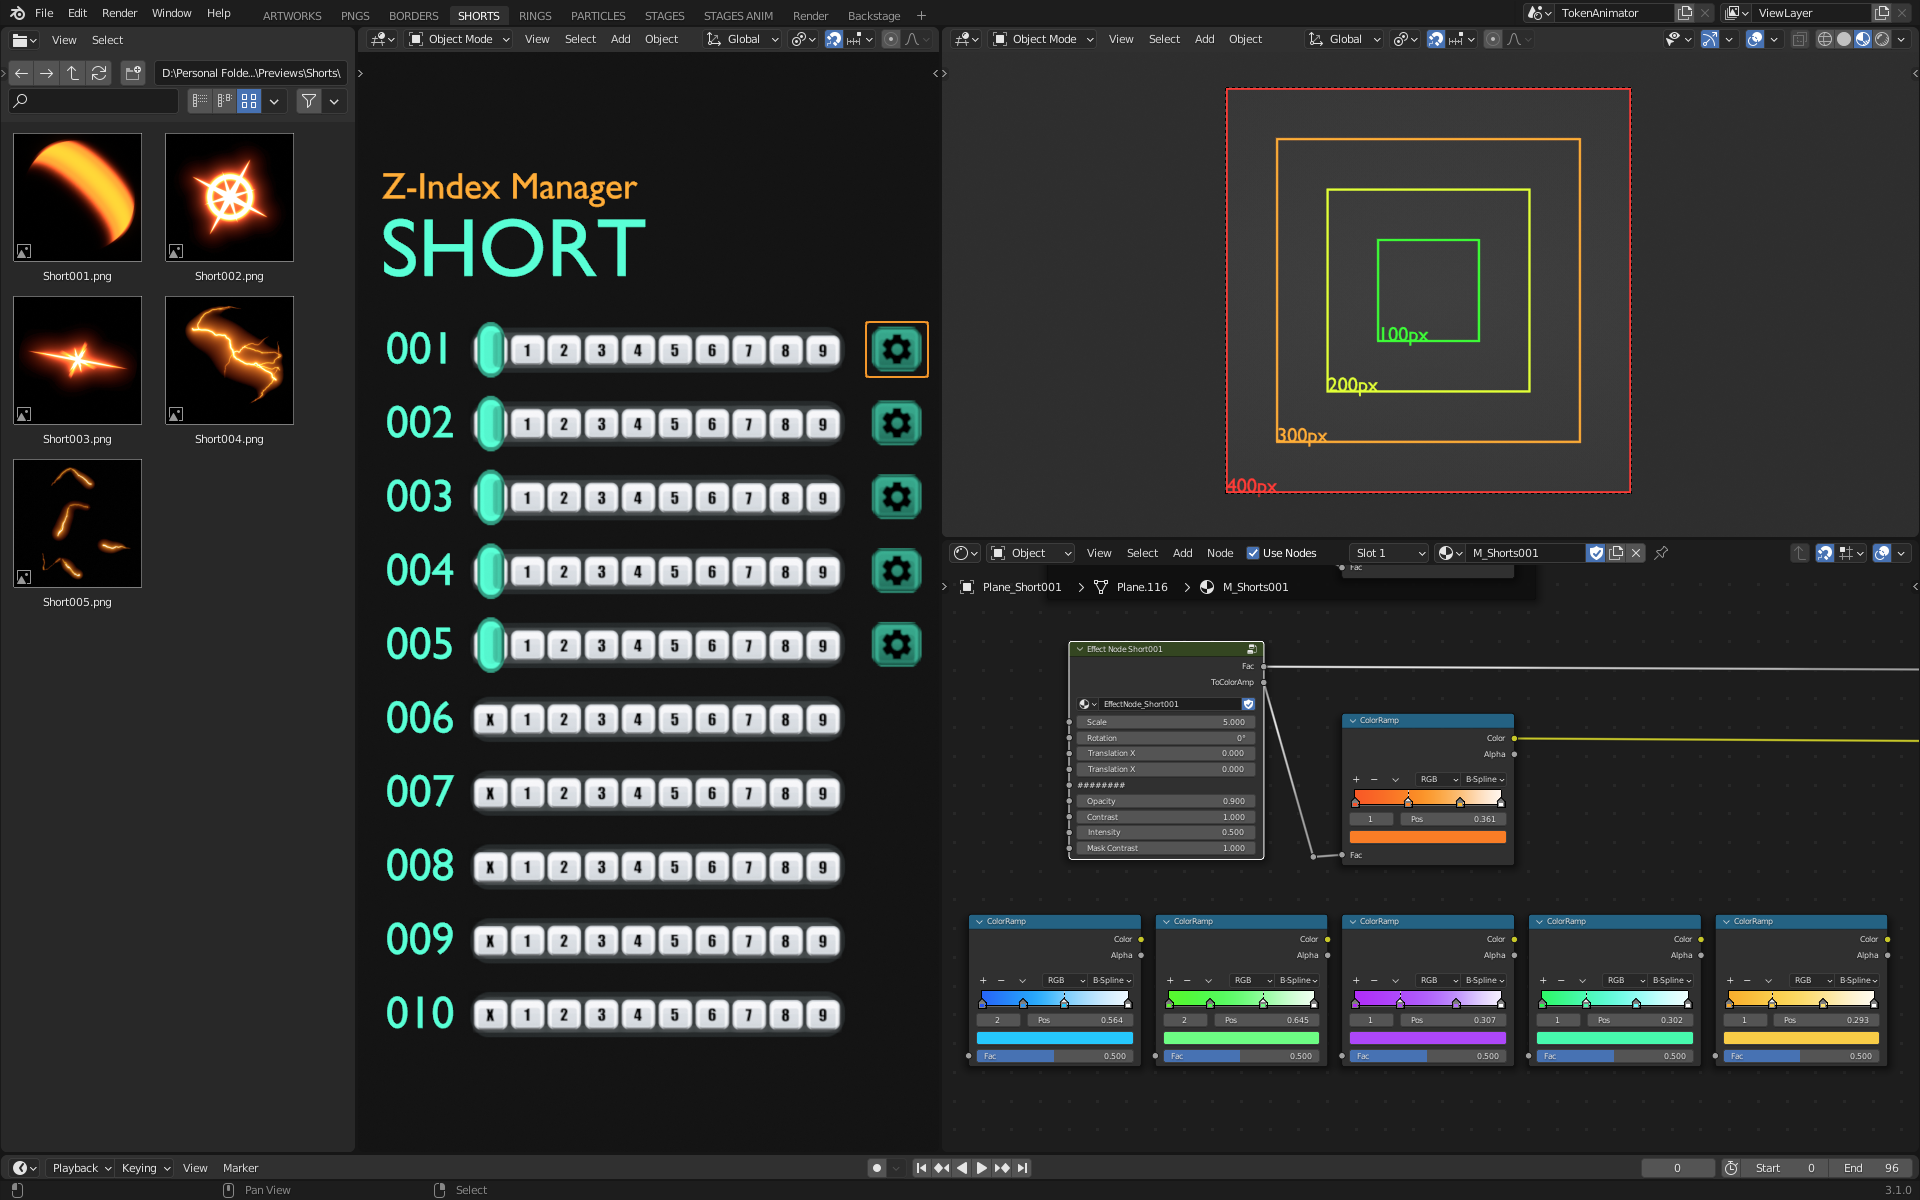
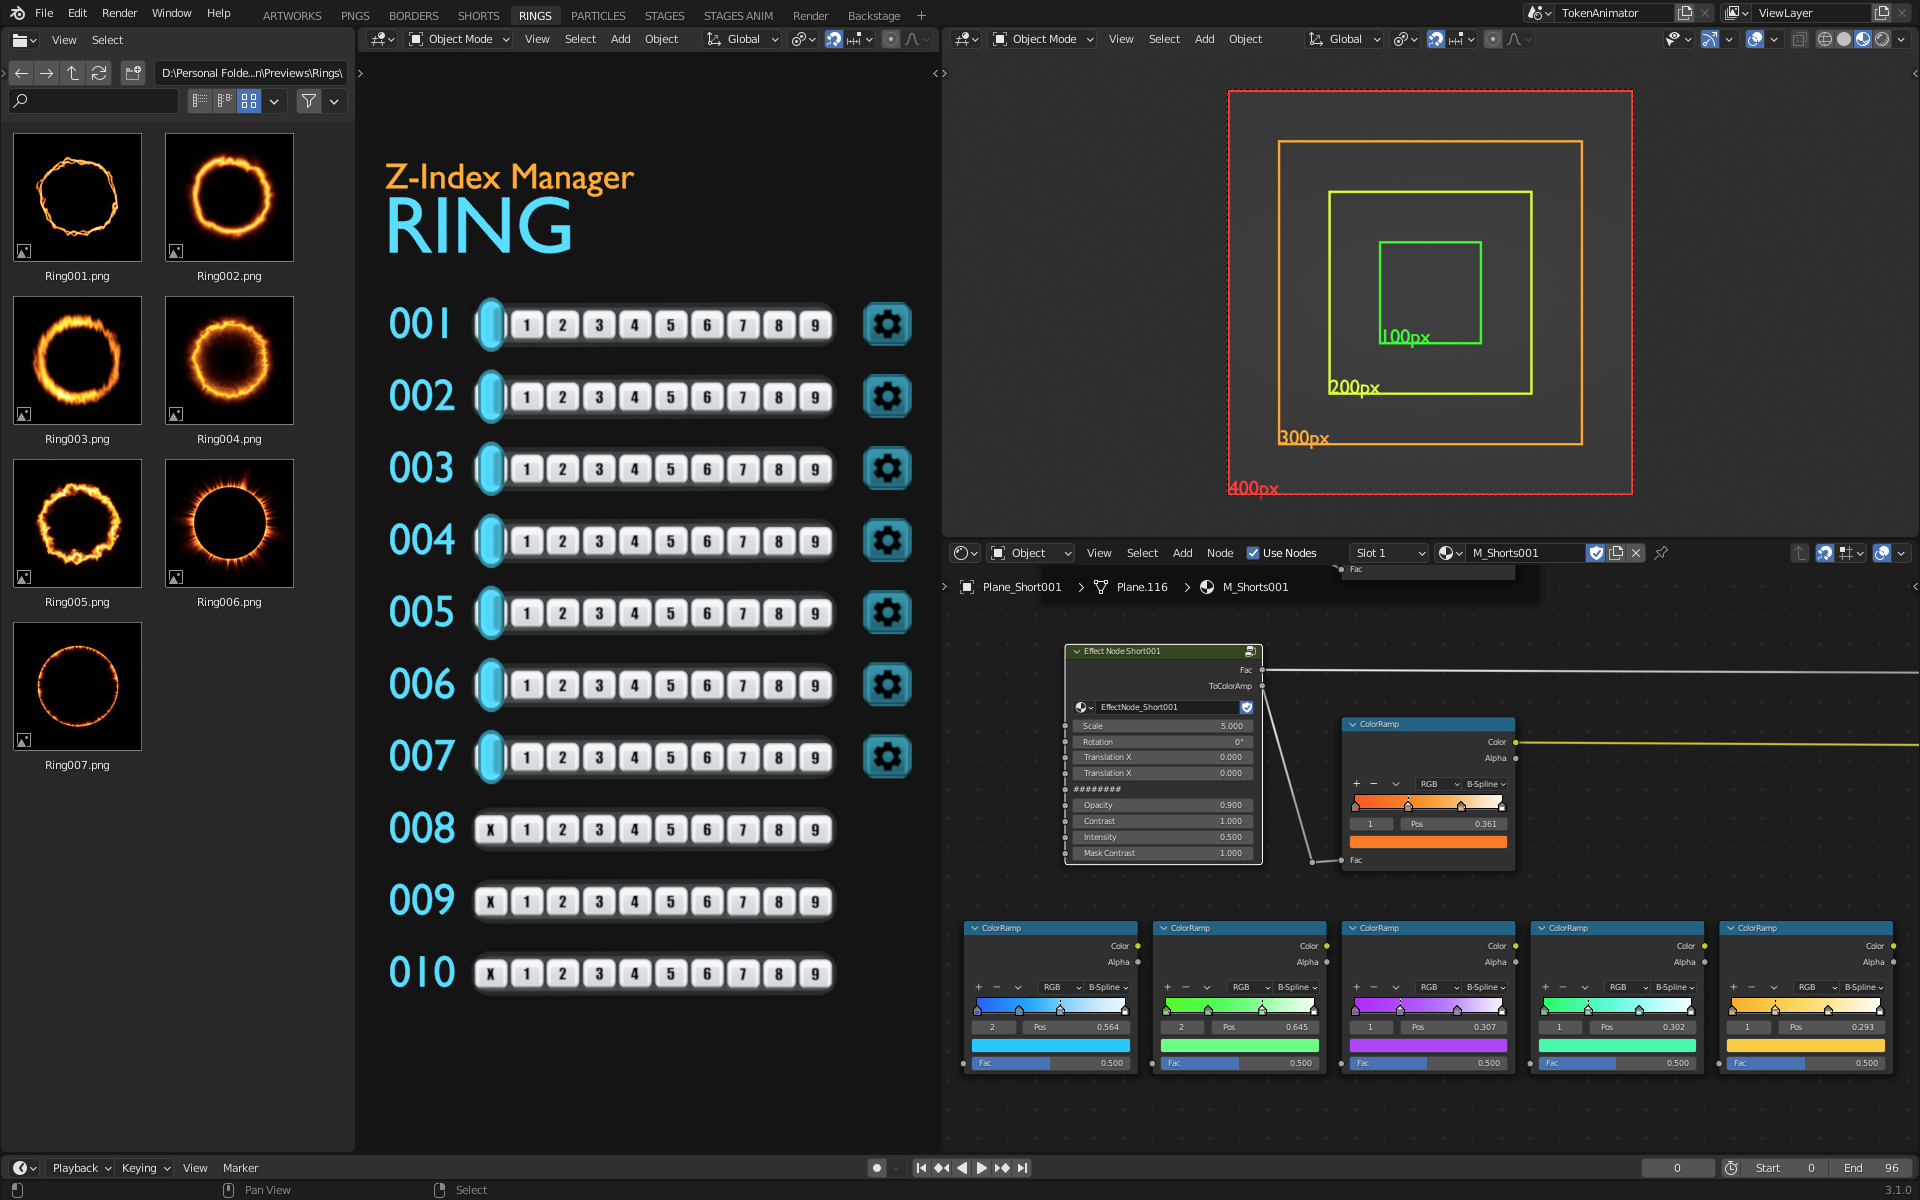
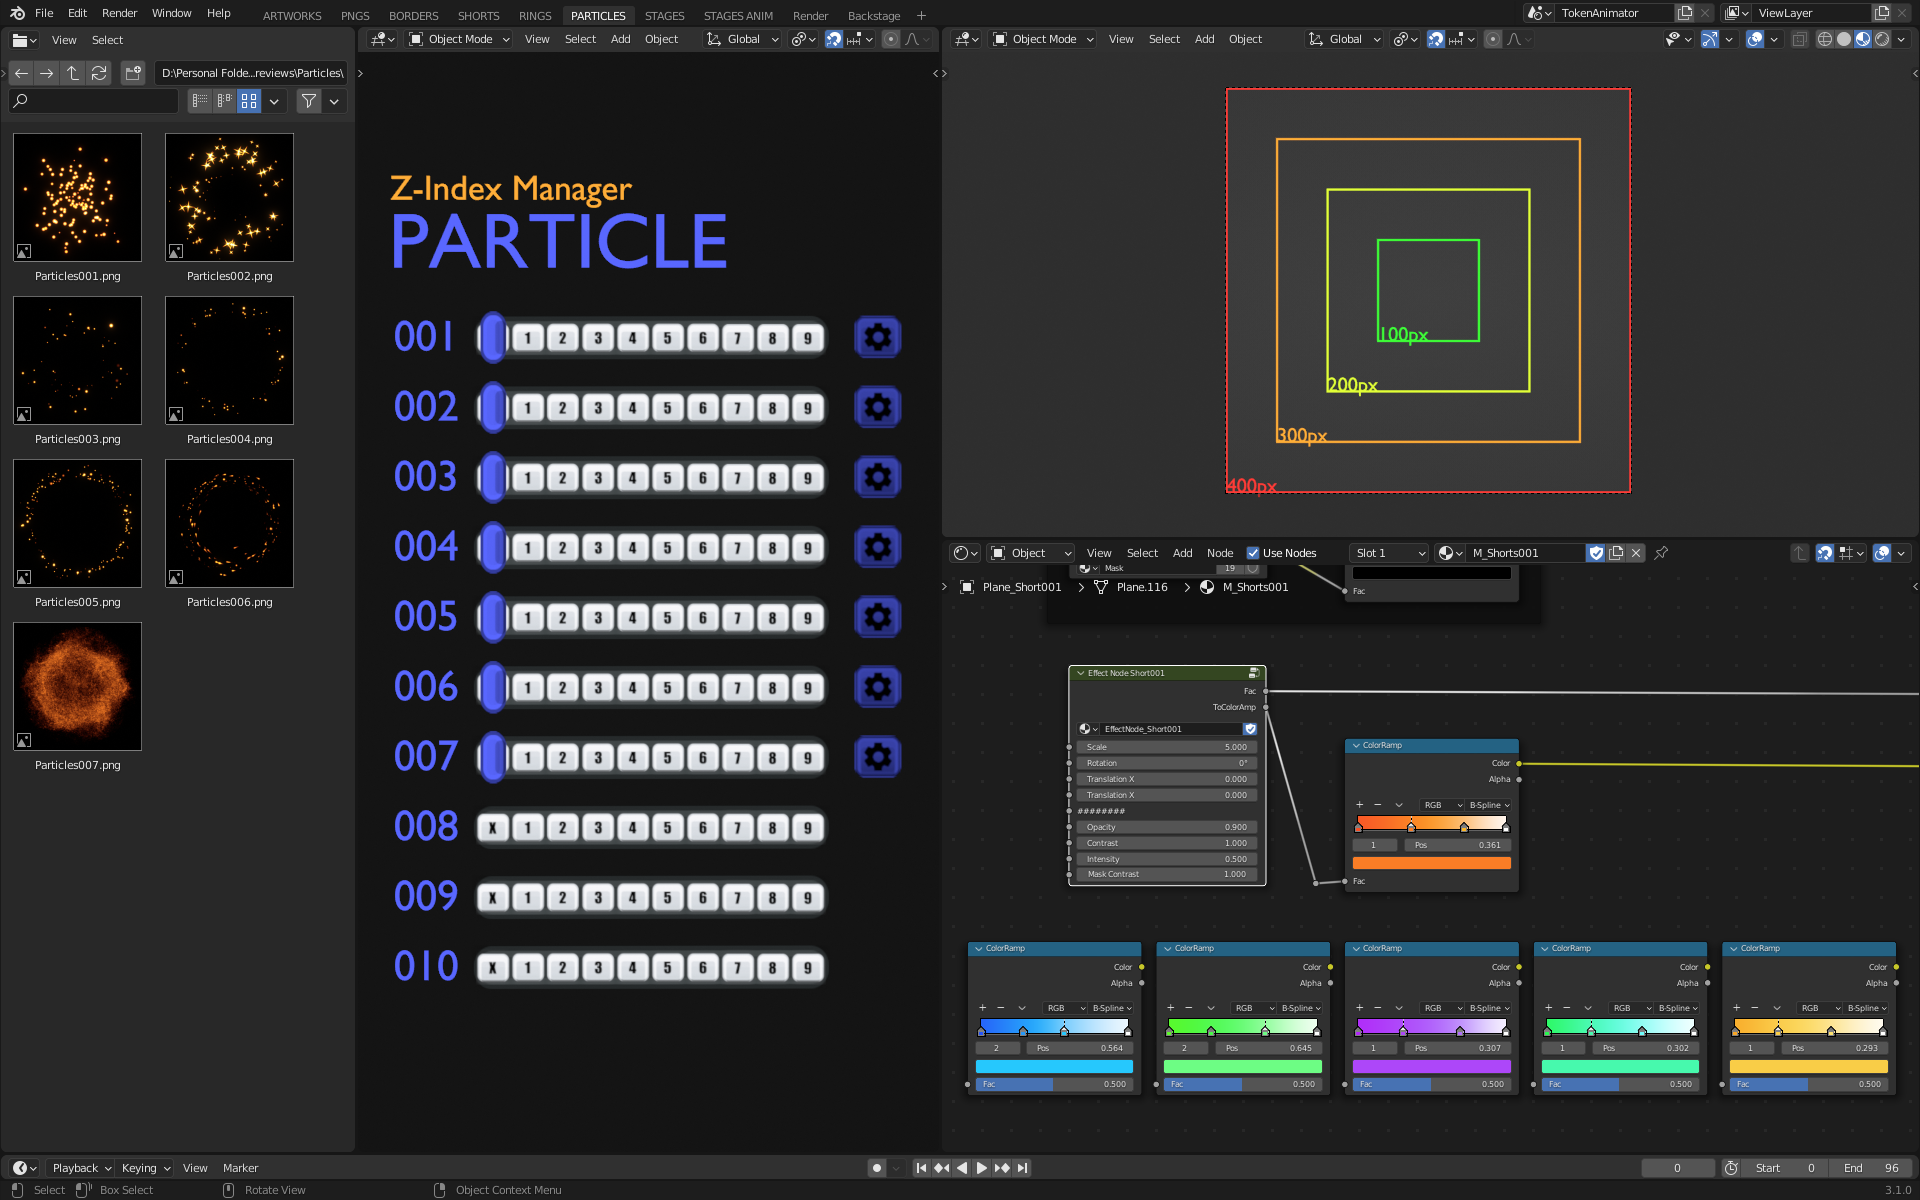
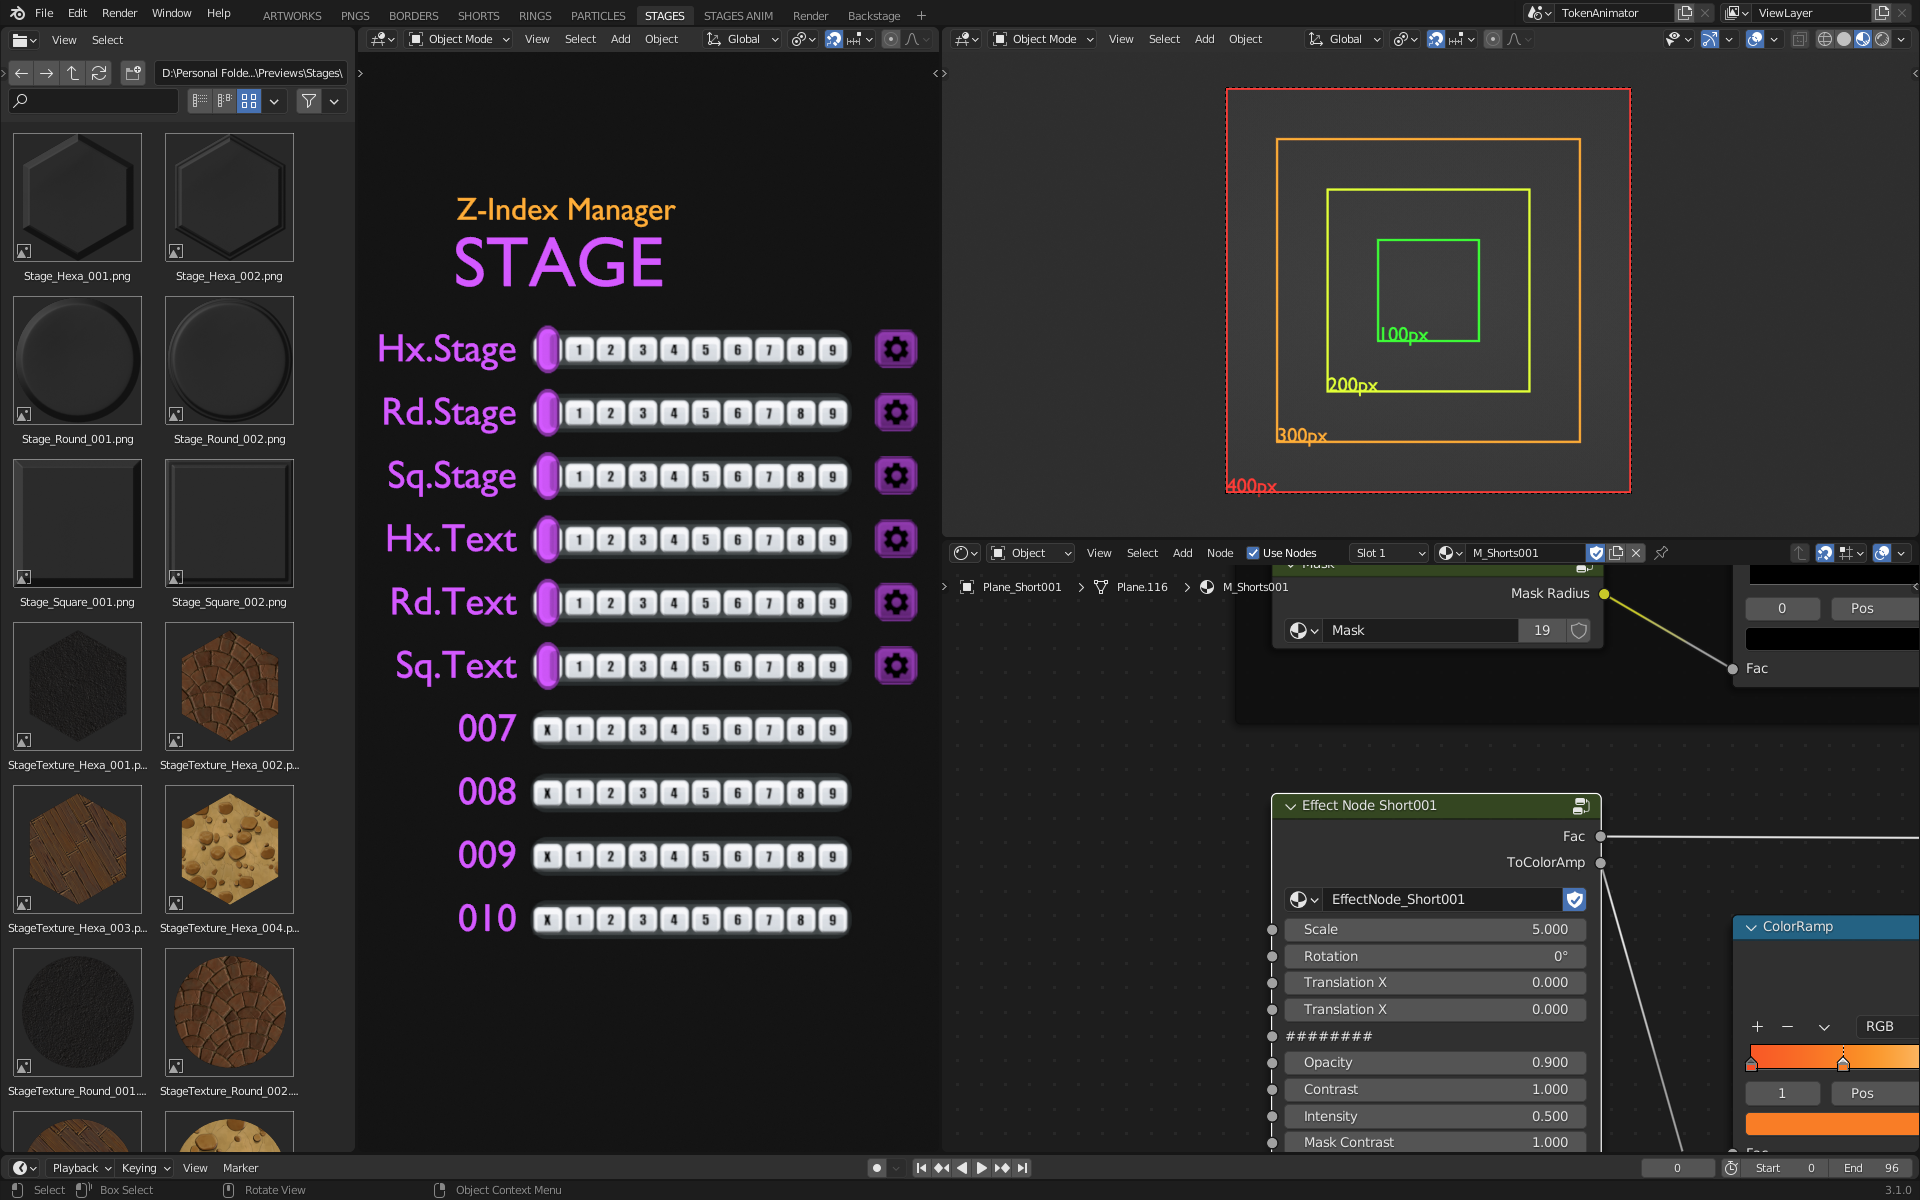
Tabs in Blender are mostly used to switch the UI layout depending on what you want to do, for example modeling, texture editing, sculpting, etc … But in this case I decided to use them to divide effects into groups. It should make it easier to navigate between type of effects and allow you to go straight to what you want to add to your token. They are located on the top part of Blender’s UI.
- BUILDER Tabs (in Uppercase)
- Utility Tabs (in lowercase)
Builder Tabs
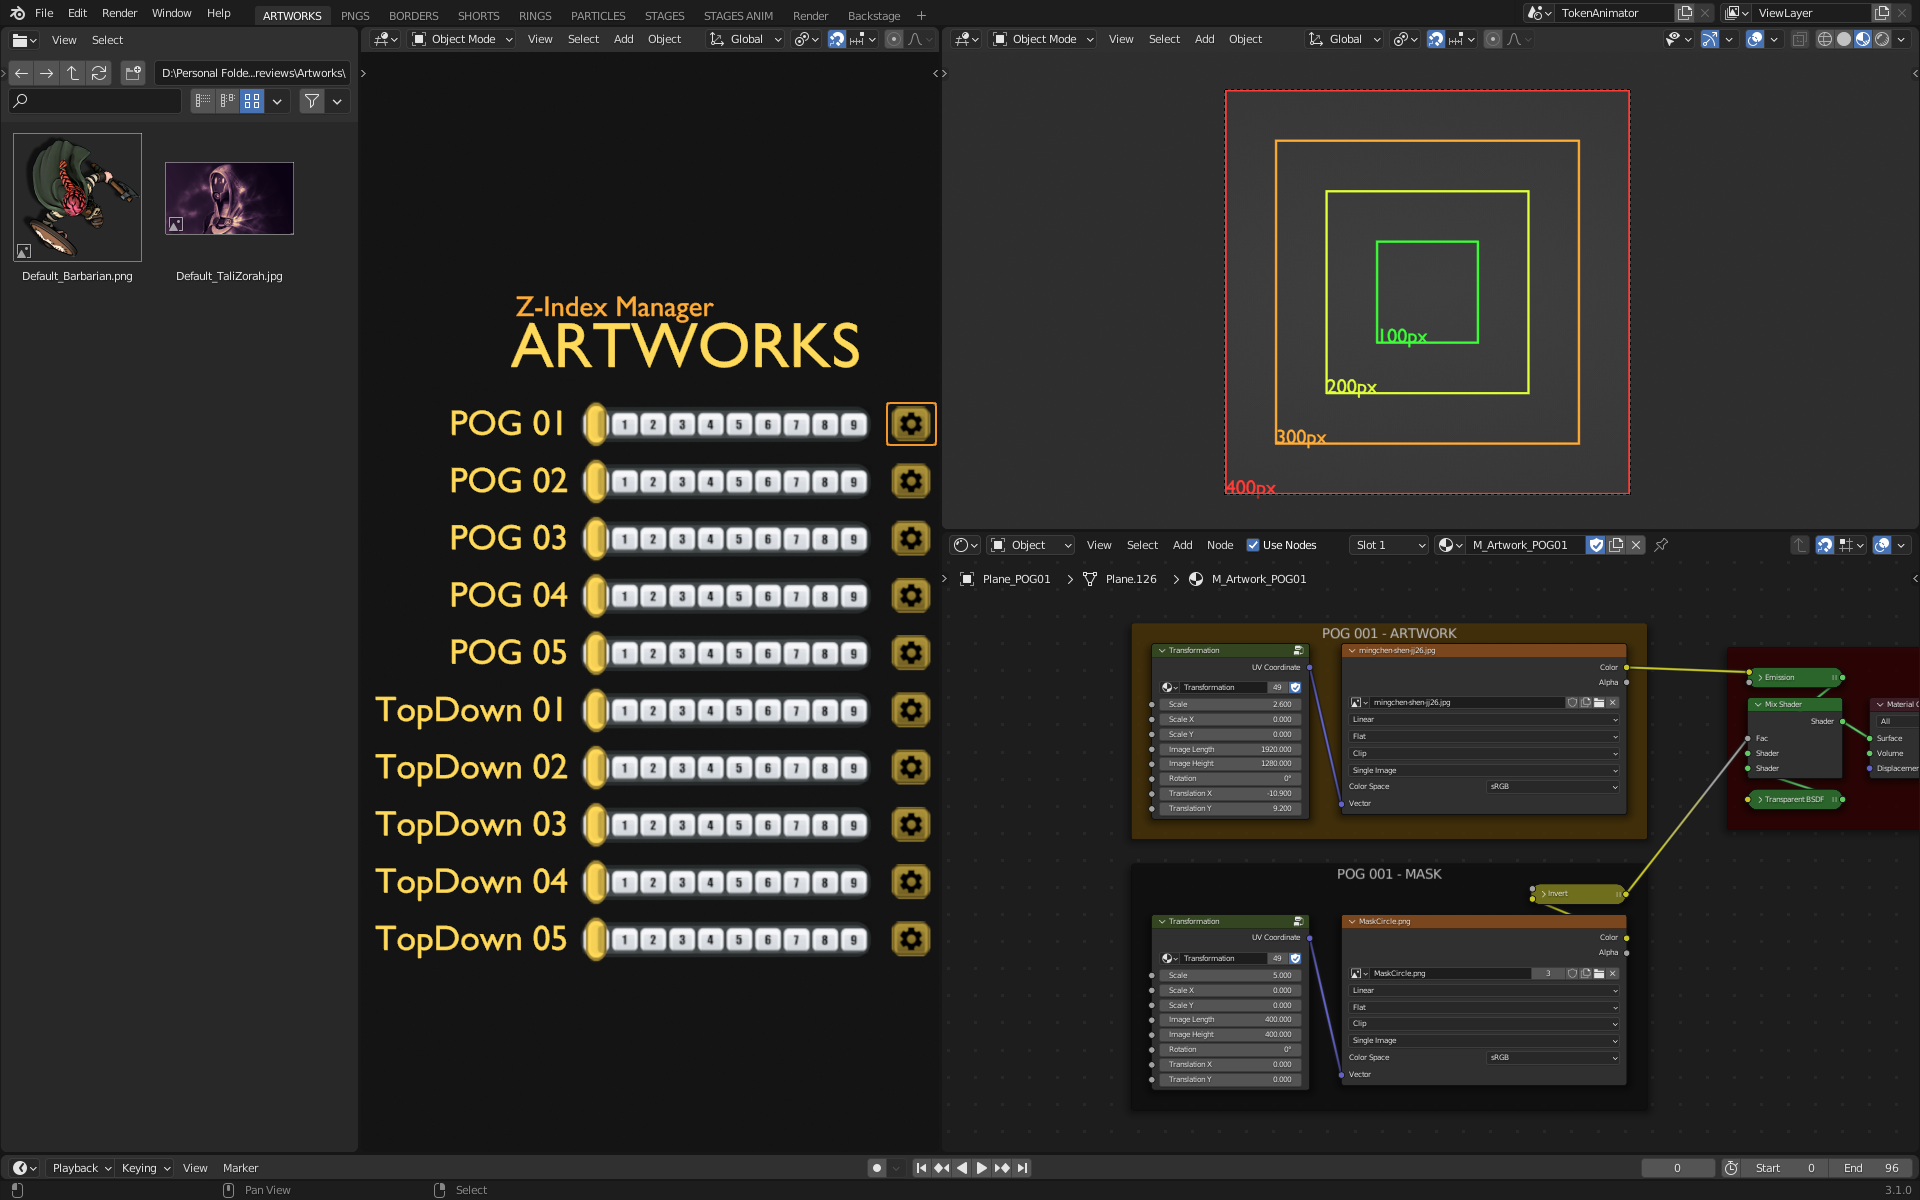
- Artworks
- This tab is where you’ll load your token image. It can be any artwork and you’ll be able to use a mask if necessary without having to resort to another software.
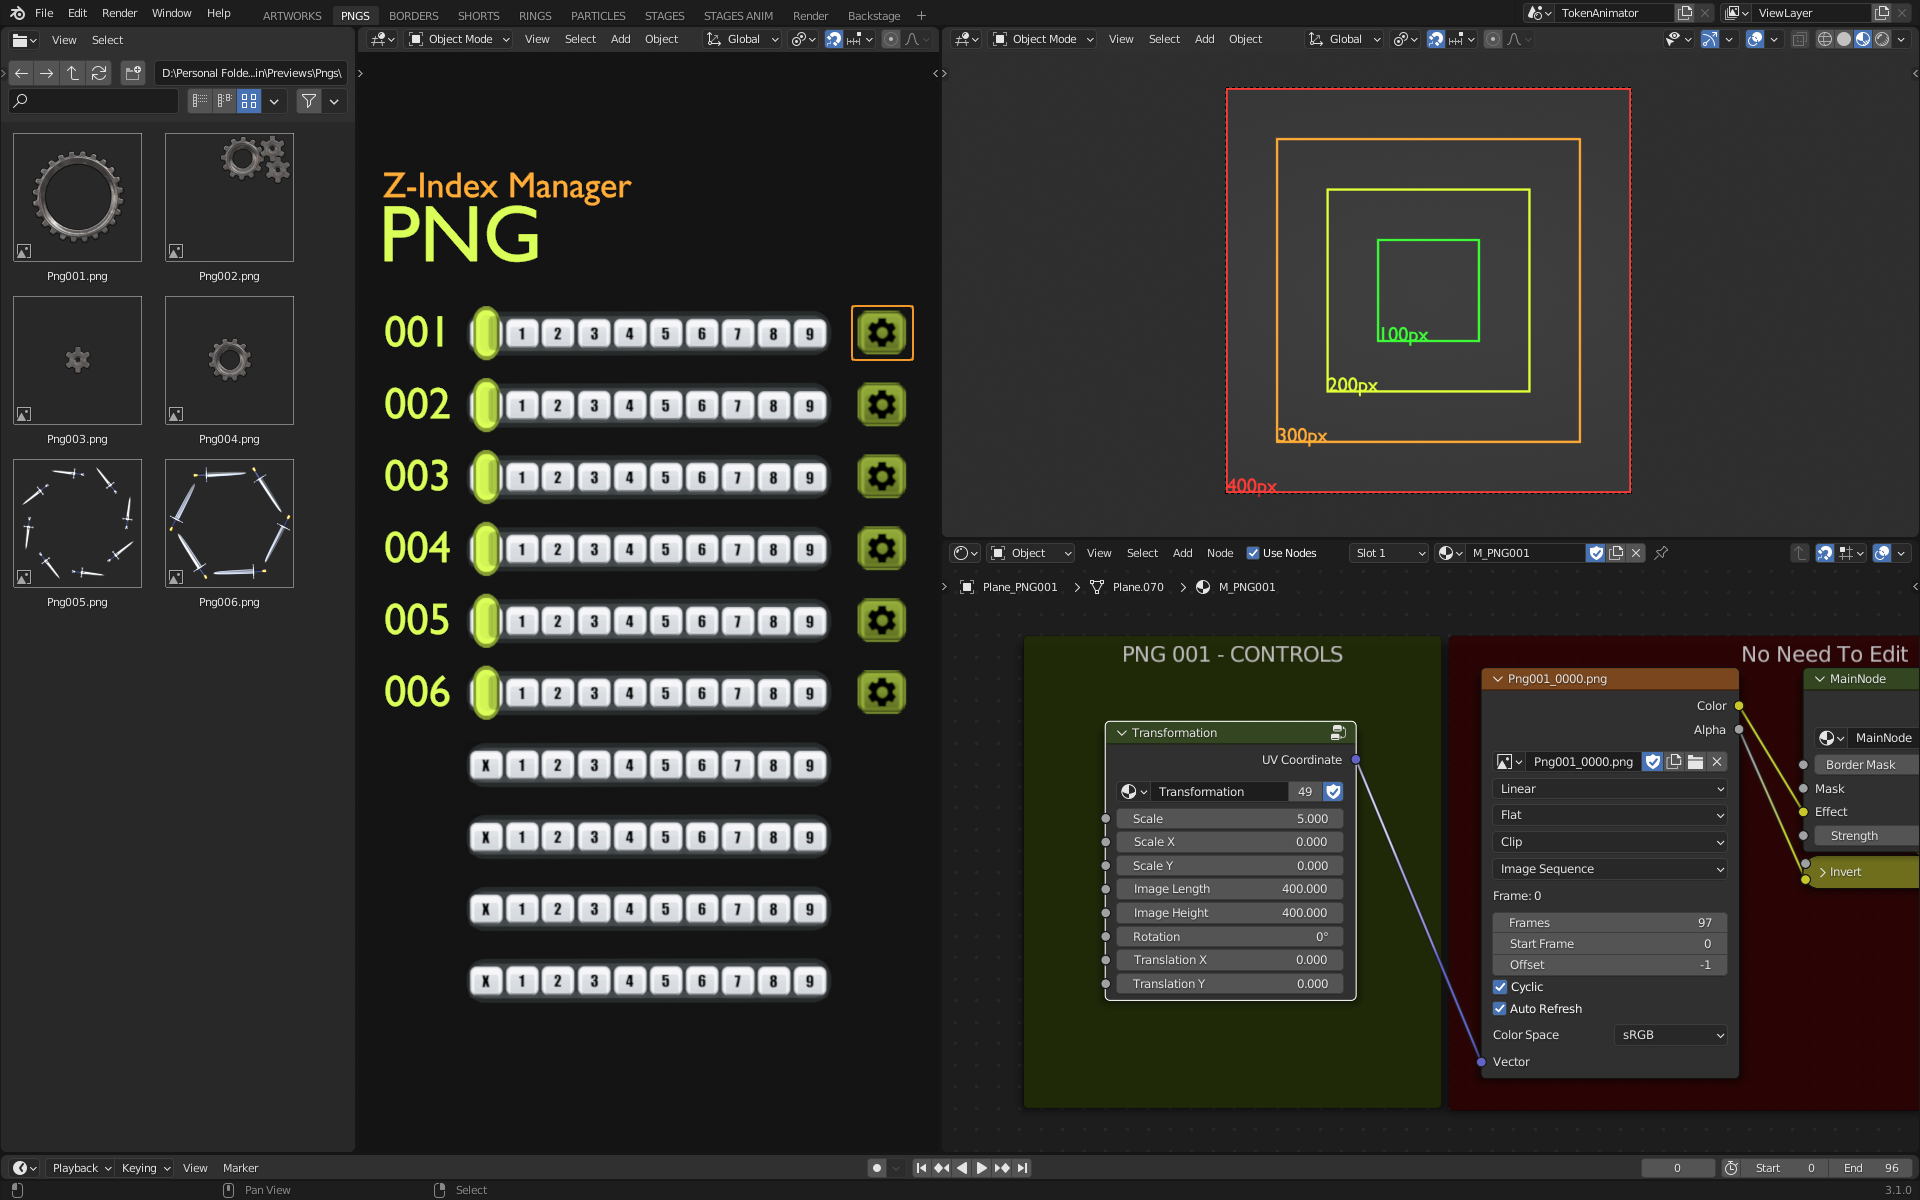
- PNGs
- Mostly composed of sequences of pngs representing artworks with effects embeded on top of them.
- For example, rotating cogs, shimmering borders, etc…
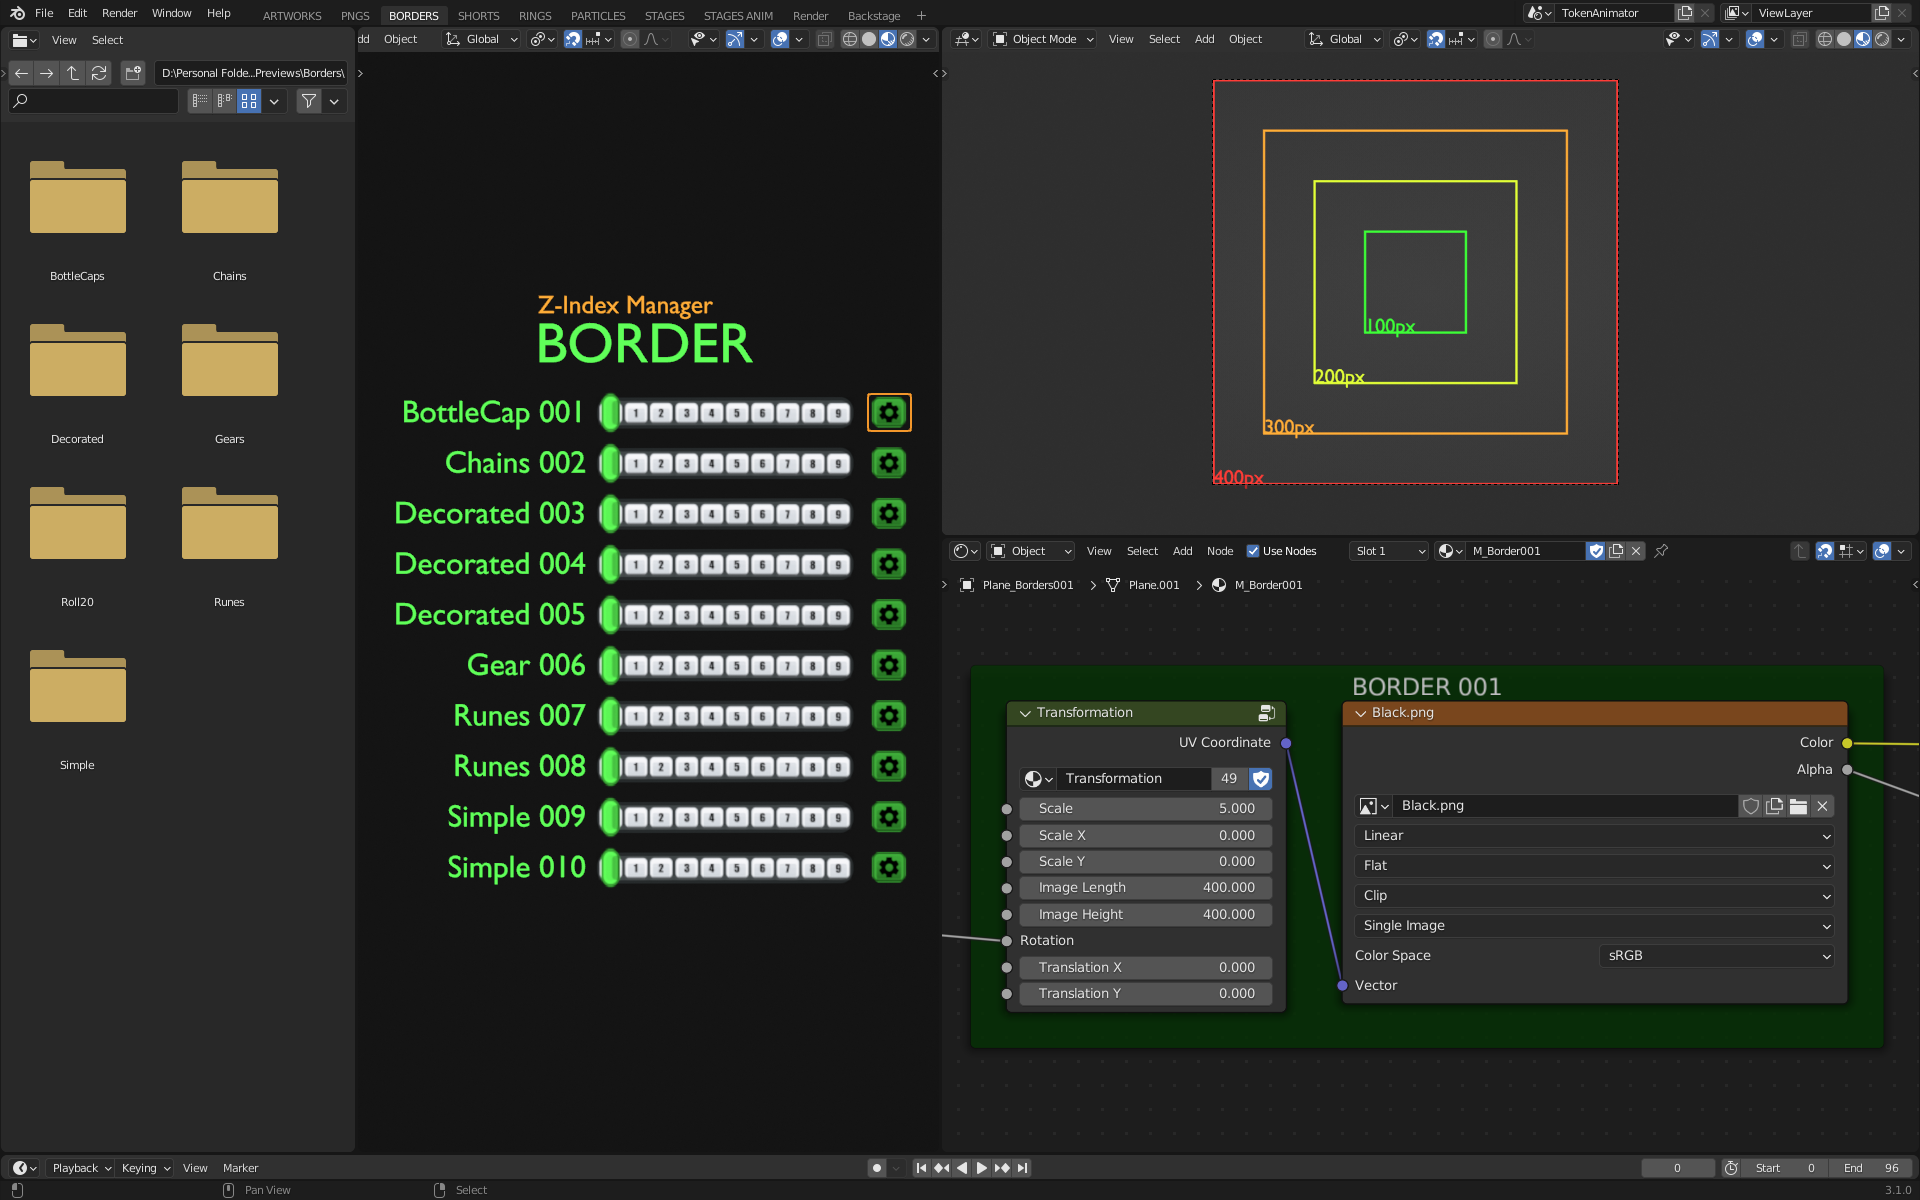
- Borders
- For now most of the available borders are from the github XXXX. But more will come in the future.
- If you want us to include specific borders you like, be sure they are under a suitable license.
- Shorts
- Very brief effects, the final animation has 97 frames in total. These effects will be shorter than that.
- For example a glint or a shimmer.
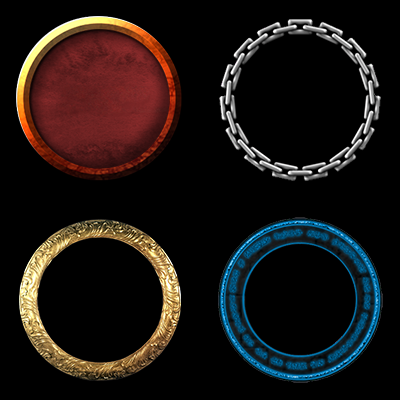
- Rings
- Speaks for itself, these effects are in a ring shape and will loop seamlessly.
- Particles
- Same as above, pretty straight forward. This tab will gather all animated effects with particles and will loop seamlessly.
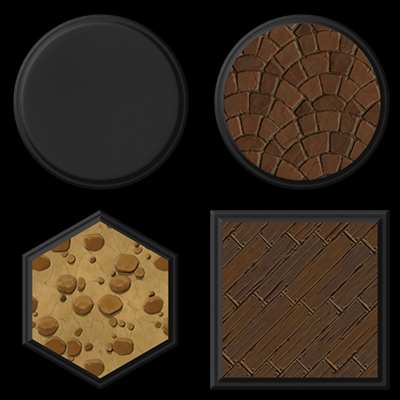
- Stages
- This one is a bit of an extra. I liked the idea of adding stages underneath topdown tokens. Like figurines when we play around a table. I don’t know if it will be popular but it’s there ! ¯\_(ツ)_/¯
Let me know ! - Different shapes are available, and also different textures for the flat side of the stage. For example, Cobblestone, Woodplanks, etc …
- This one is a bit of an extra. I liked the idea of adding stages underneath topdown tokens. Like figurines when we play around a table. I don’t know if it will be popular but it’s there ! ¯\_(ツ)_/¯
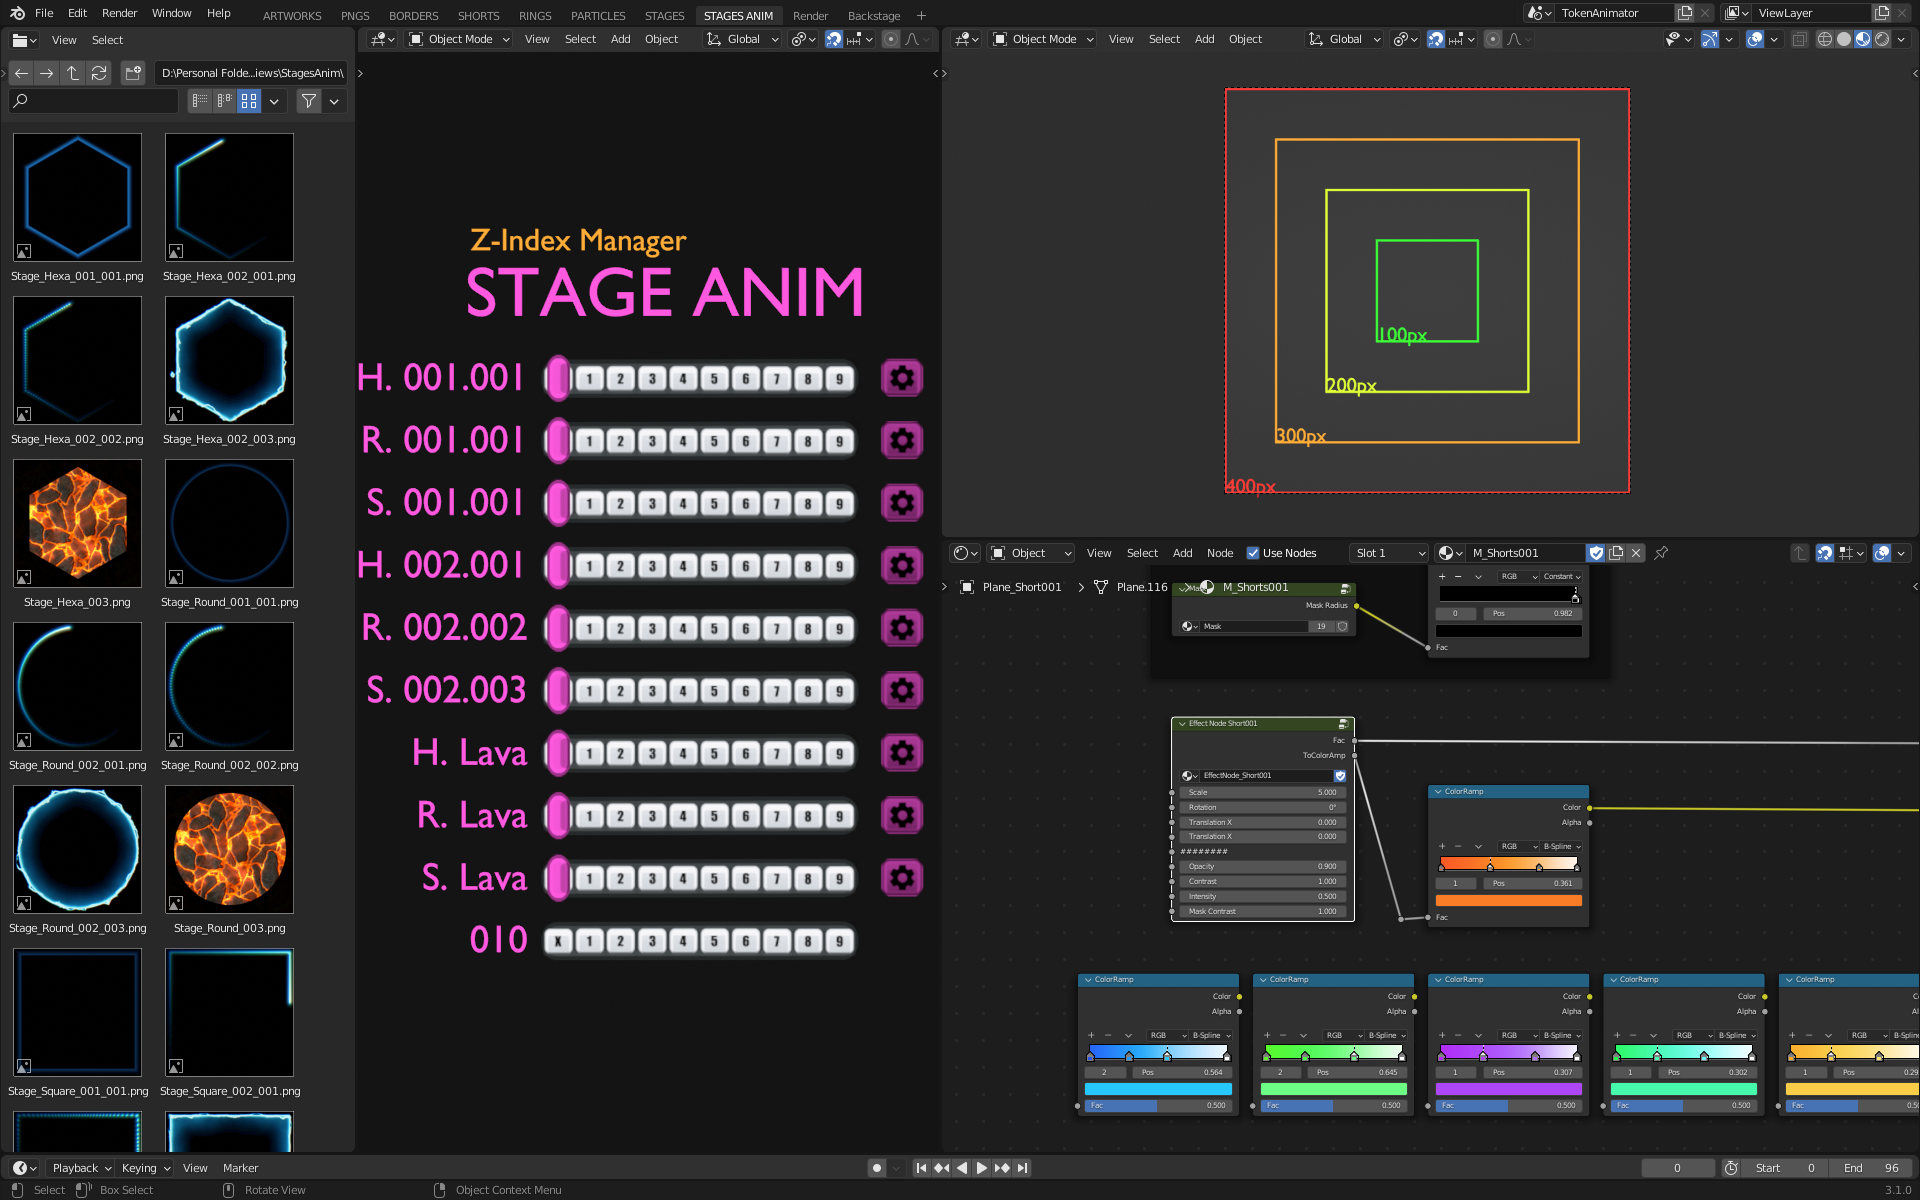
- Stage Anim
- Related to the previous tabs, these are animations made to be added on top of the stages. Could be useful to simply highlight an imporant NPC.
Utility Tabs
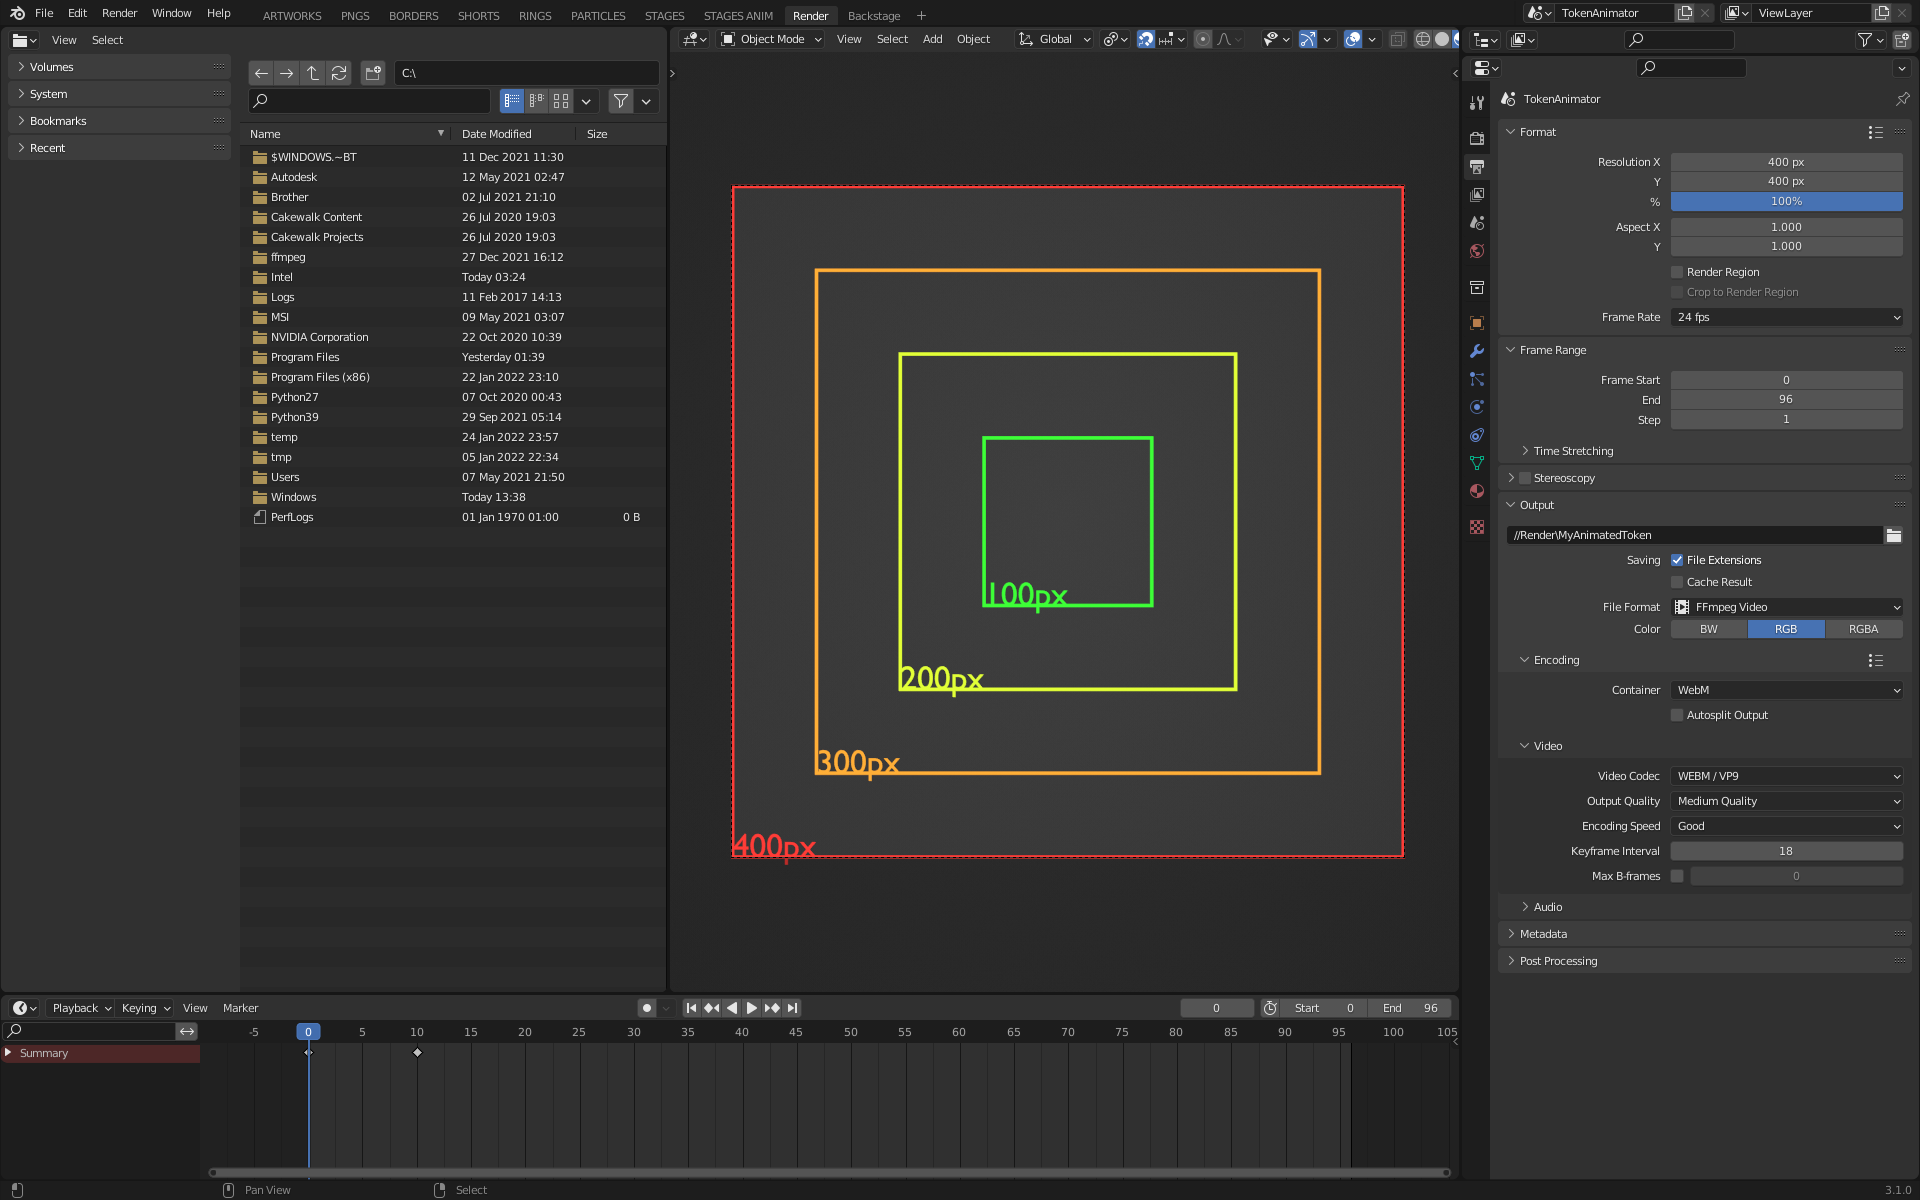
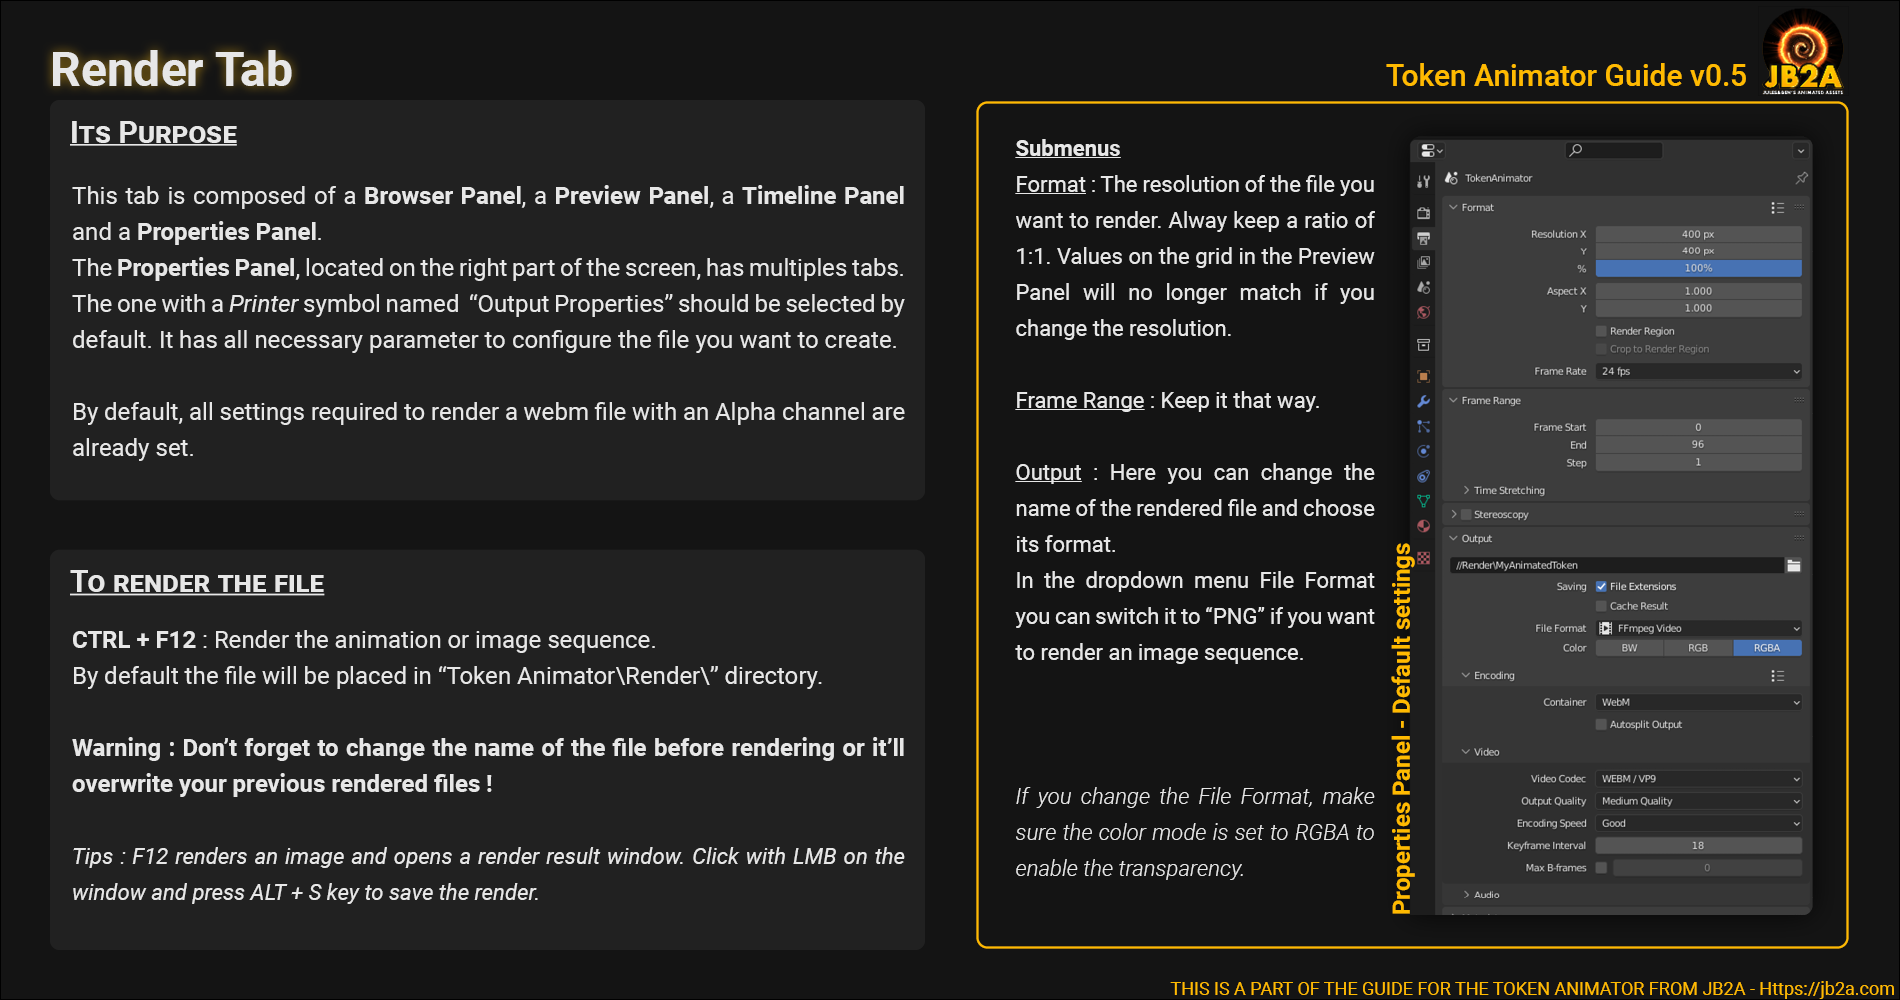
- Render
- When your token is ready to render, you can hit CTRL+F12 to render your animated token in a webm format. Or you can use this tab to change the settings to render it to another format or an image sequence.
- You can also change the output resolution or the name of the rendered file from here.
- Backstage
- This is were I test things to keep other tabs tidy. I decided to leave it in the final file just in case some people want to do the same.
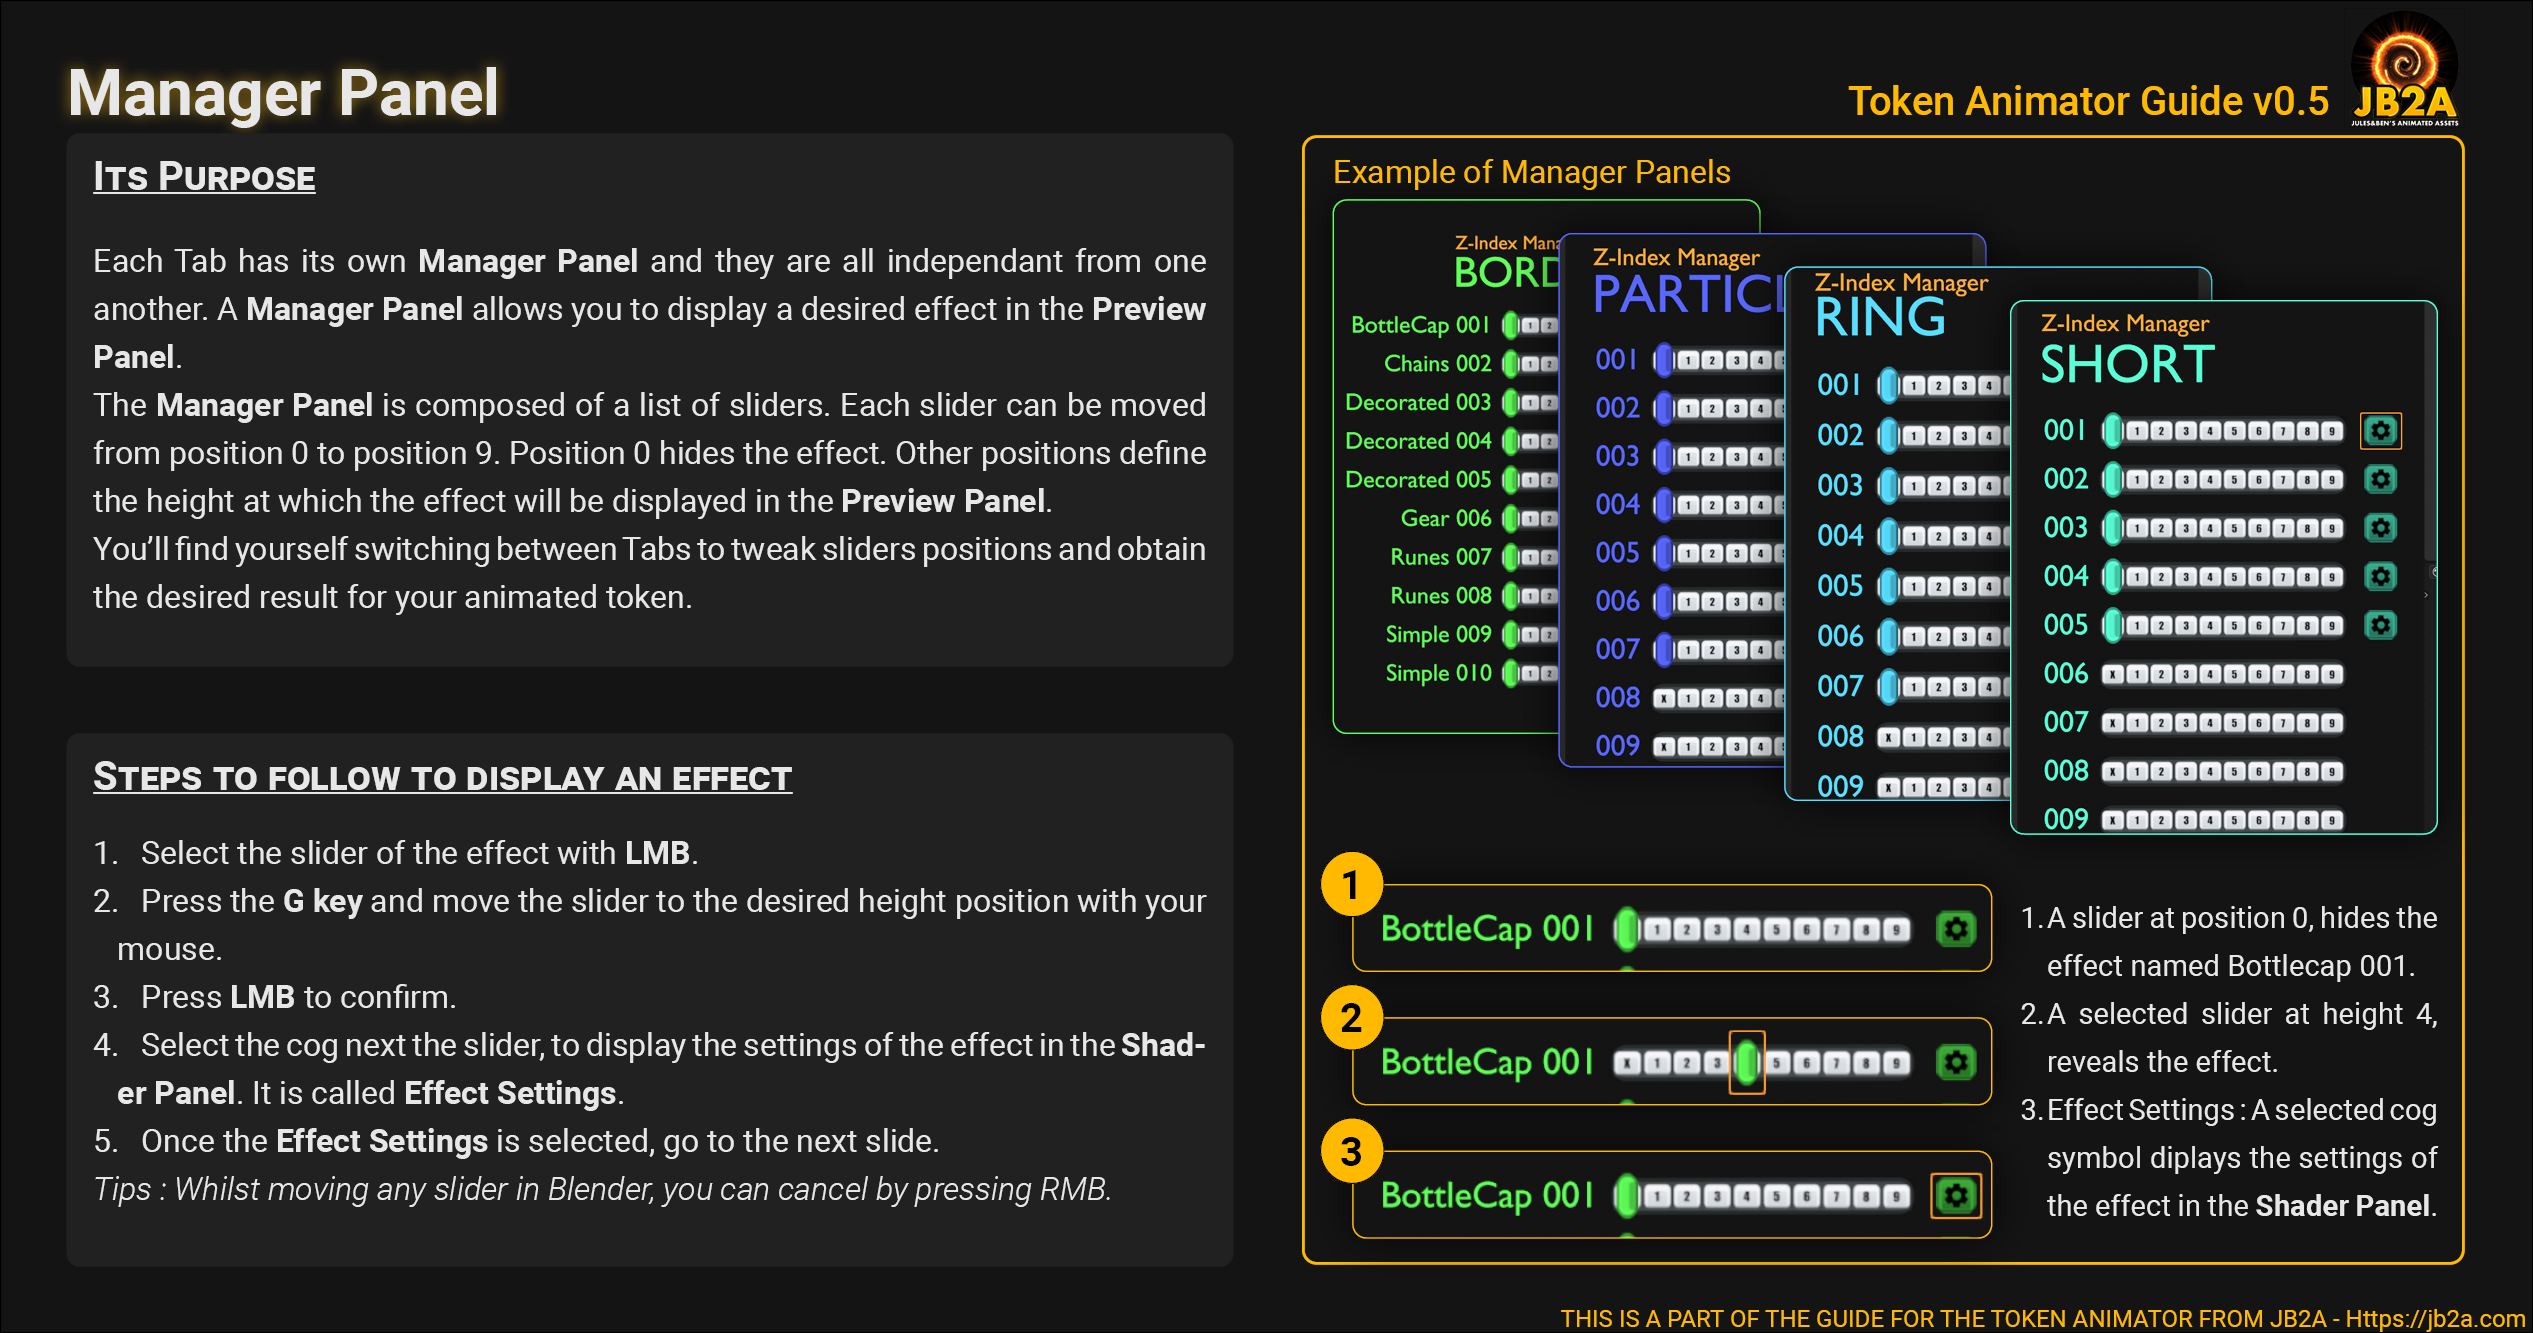
Manager Panel
Shortcuts to remember :
- Left Mouse Button to select a slider, cog or slider’s names.
- G Key to move a selected slider.
- TAB key to edit a selected slider’s name.
- Mouse Wheel to zoom in or out.
- Middle Mouse Button to orbit the view. (Should never be needed here)
- CTRL + Middle Mouse Button to pan the view.
- Numpad 7 to toggle back to Top View.
Preview Panel
Note : The Grid is set up to be invisible in the final render.
Shortcuts to remember :
- Mouse Wheel to zoom in or out the view.
- Middle Mouse Button to orbit the view. (Should never be needed)
- CTRL + Middle Mouse Button to pan the view.
- Numpad 0 to toggle back to the camera view point. (In case you lost focus on the camera’s point of view)
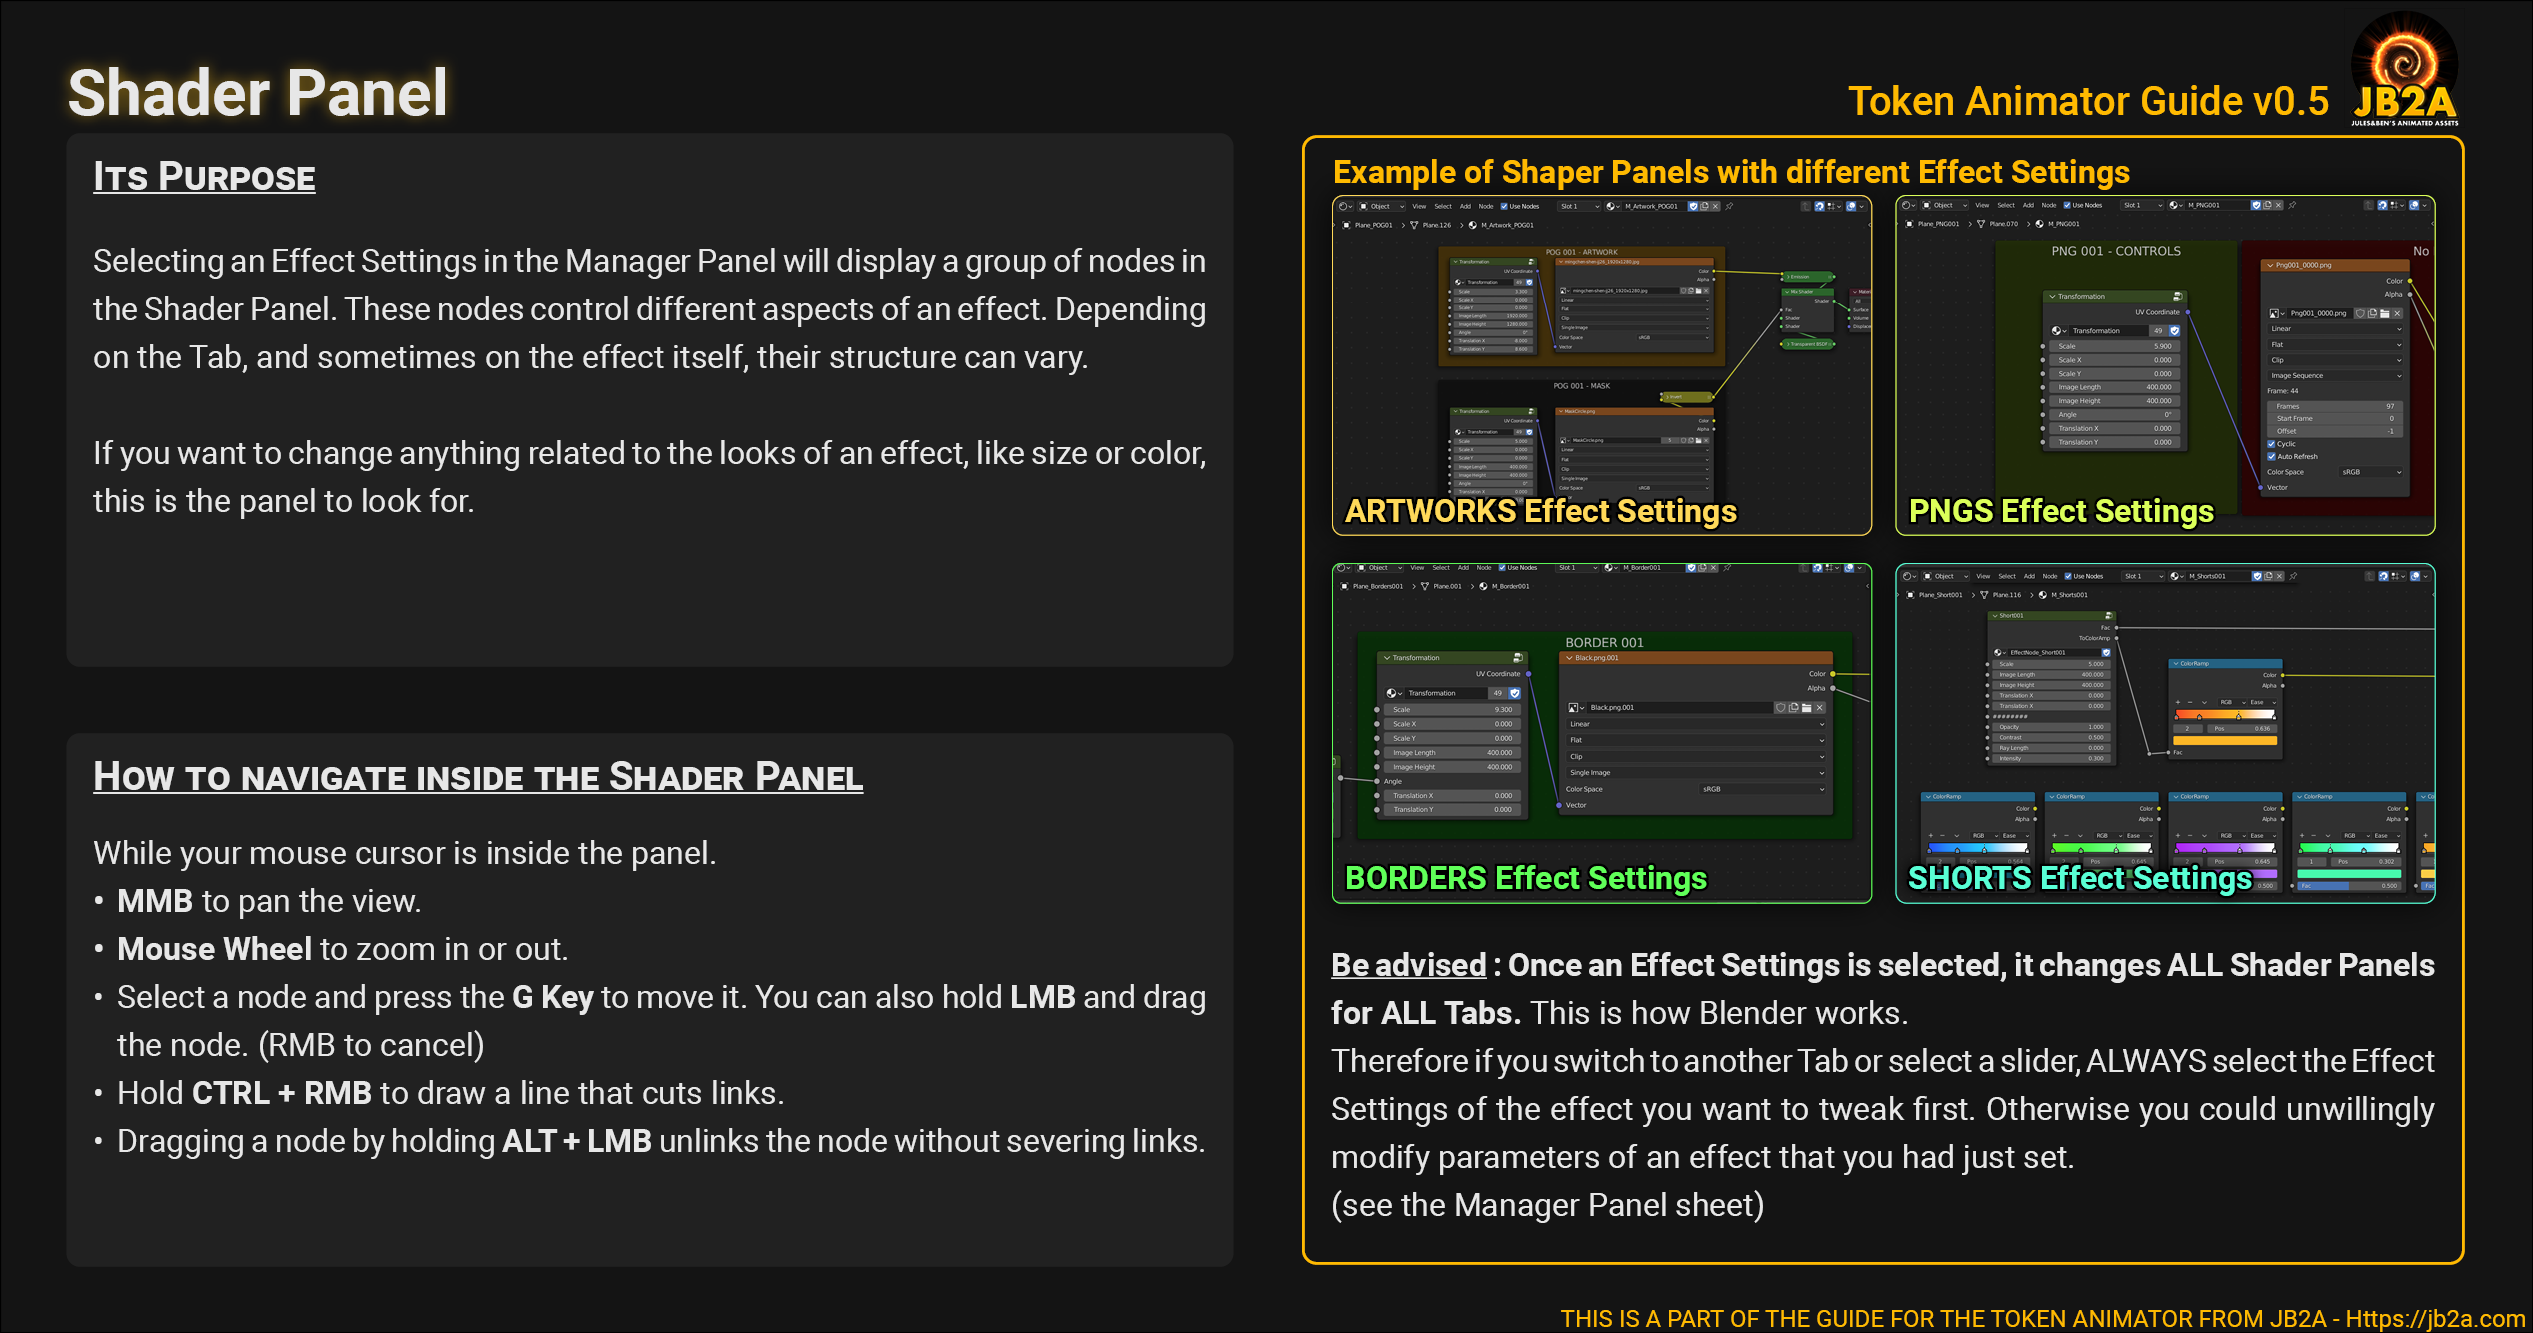
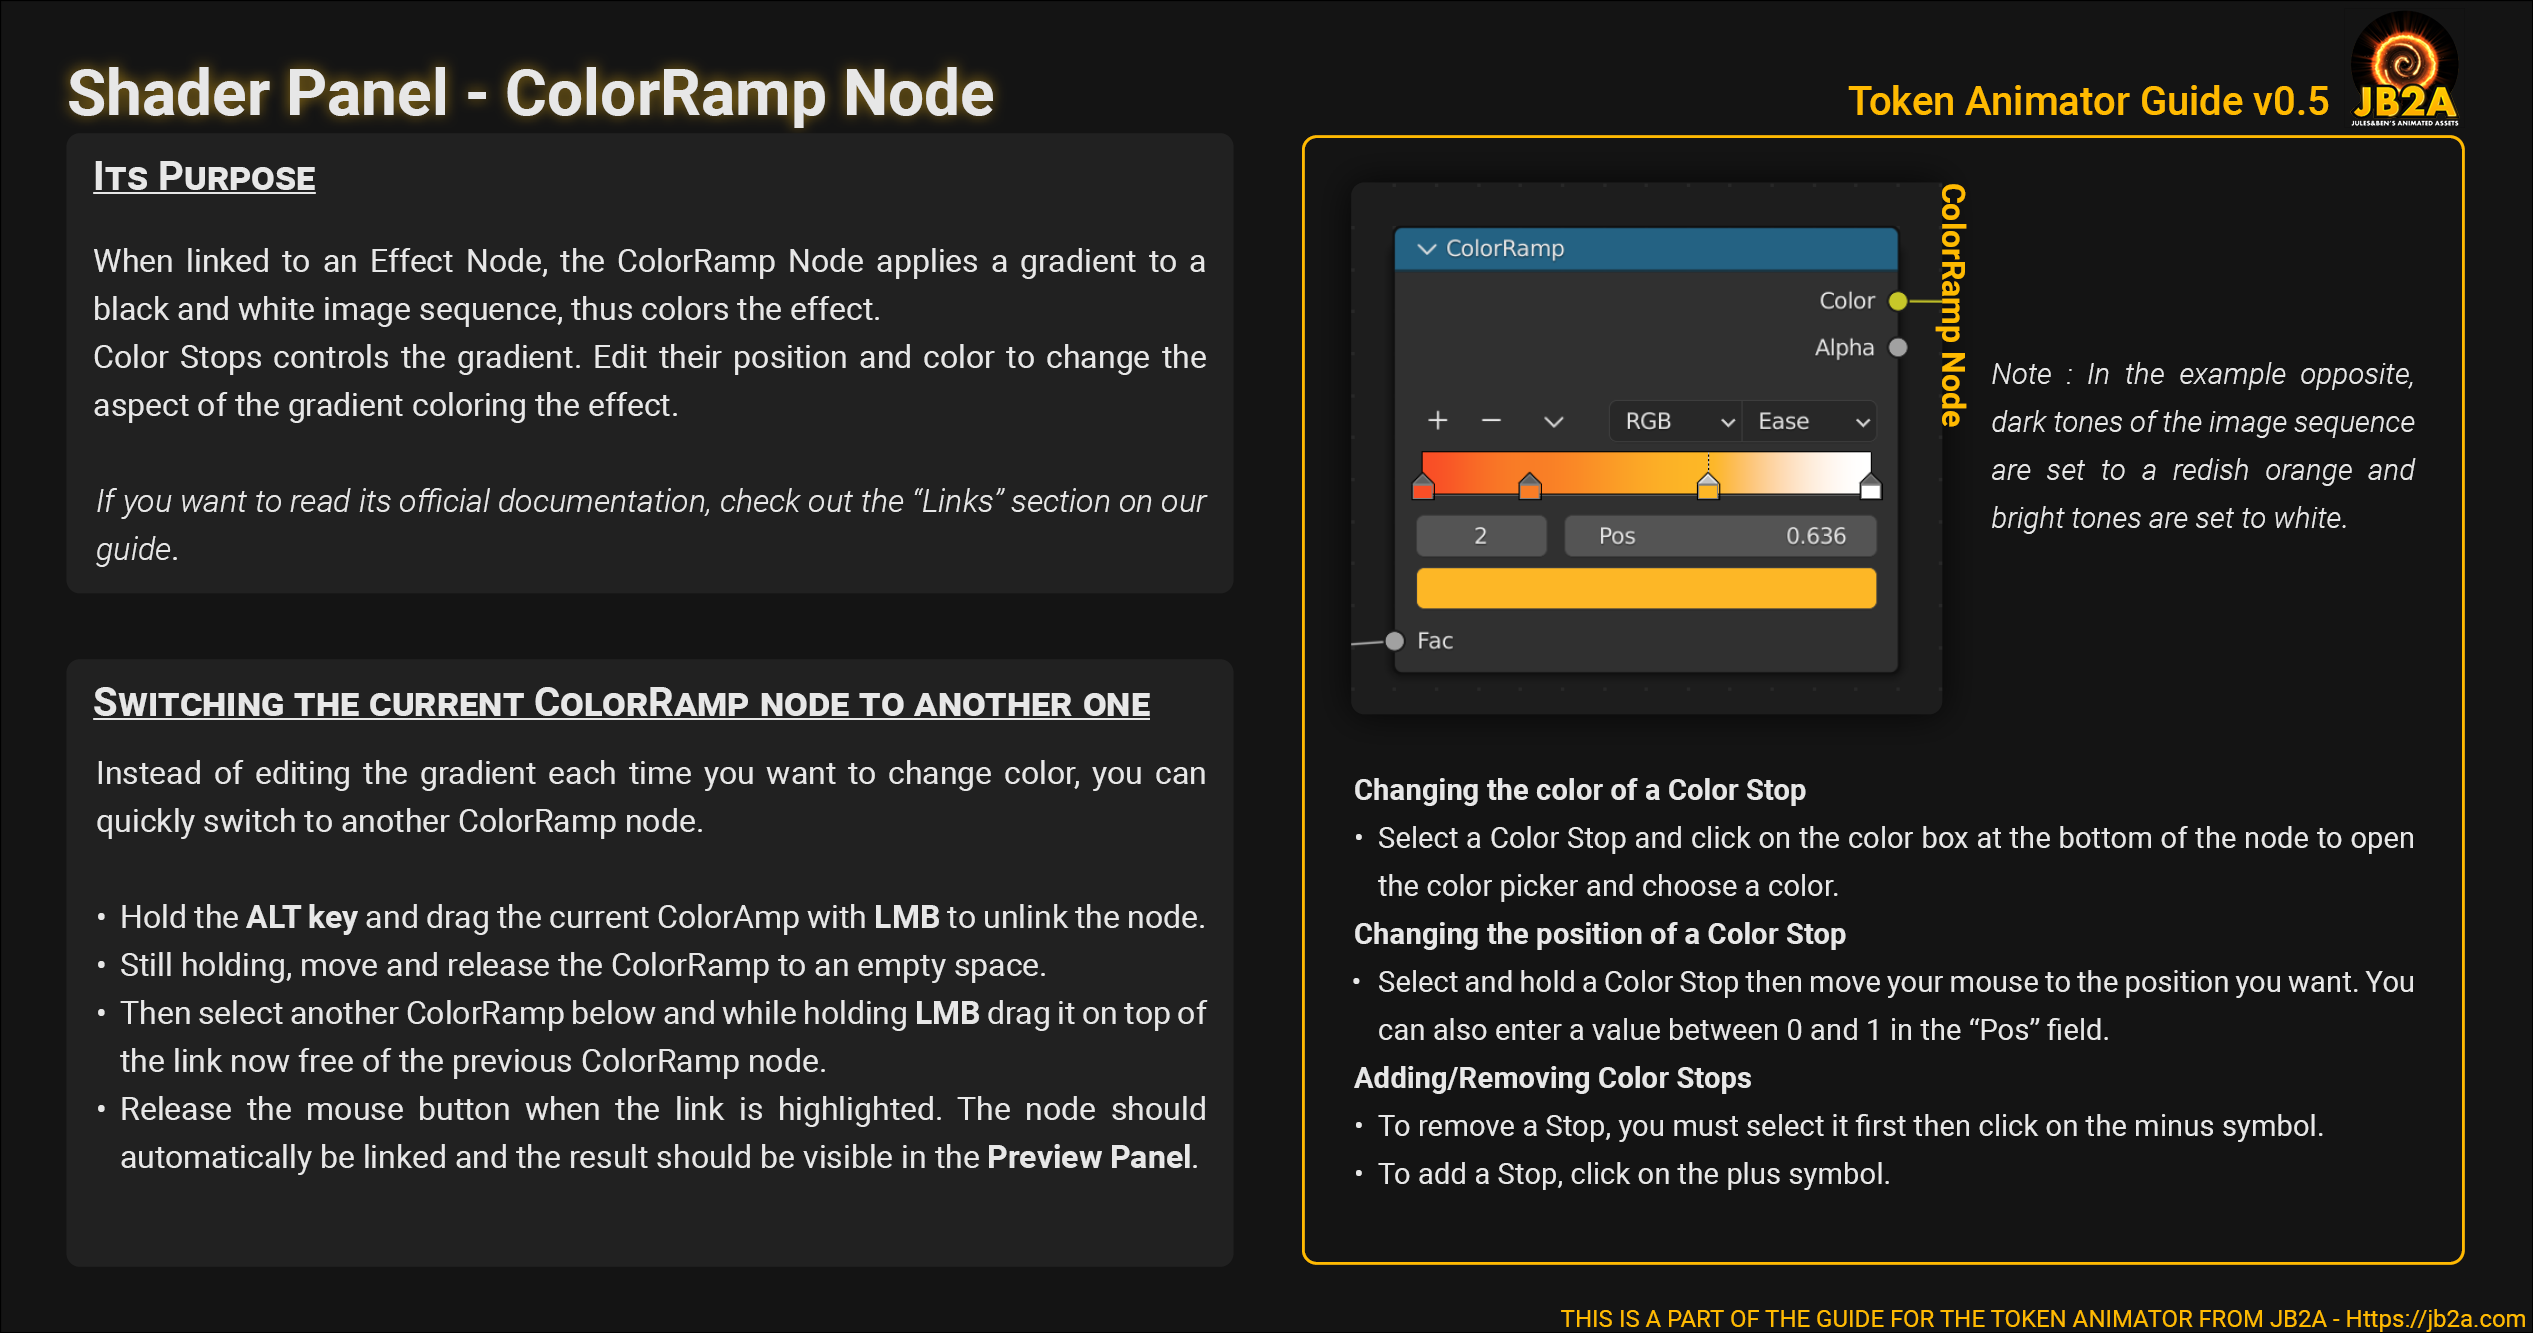
Shader Panel
Shortcuts to remember :
- Mouse Wheel to zoom in and out.
- Middle Mouse Button to pan the view.
- Home Key to frame all the node.
- Numpad . to frame the selected node.
- Hold CTRL + Right Mouse Button to cut a node link.
- Hold Alt and drag a node with Left Mouse Button to unlink it without severing the link.
- Press the G Key while having a node selected to move it. You can also hold Left Mouse Button on a node to drag it around.
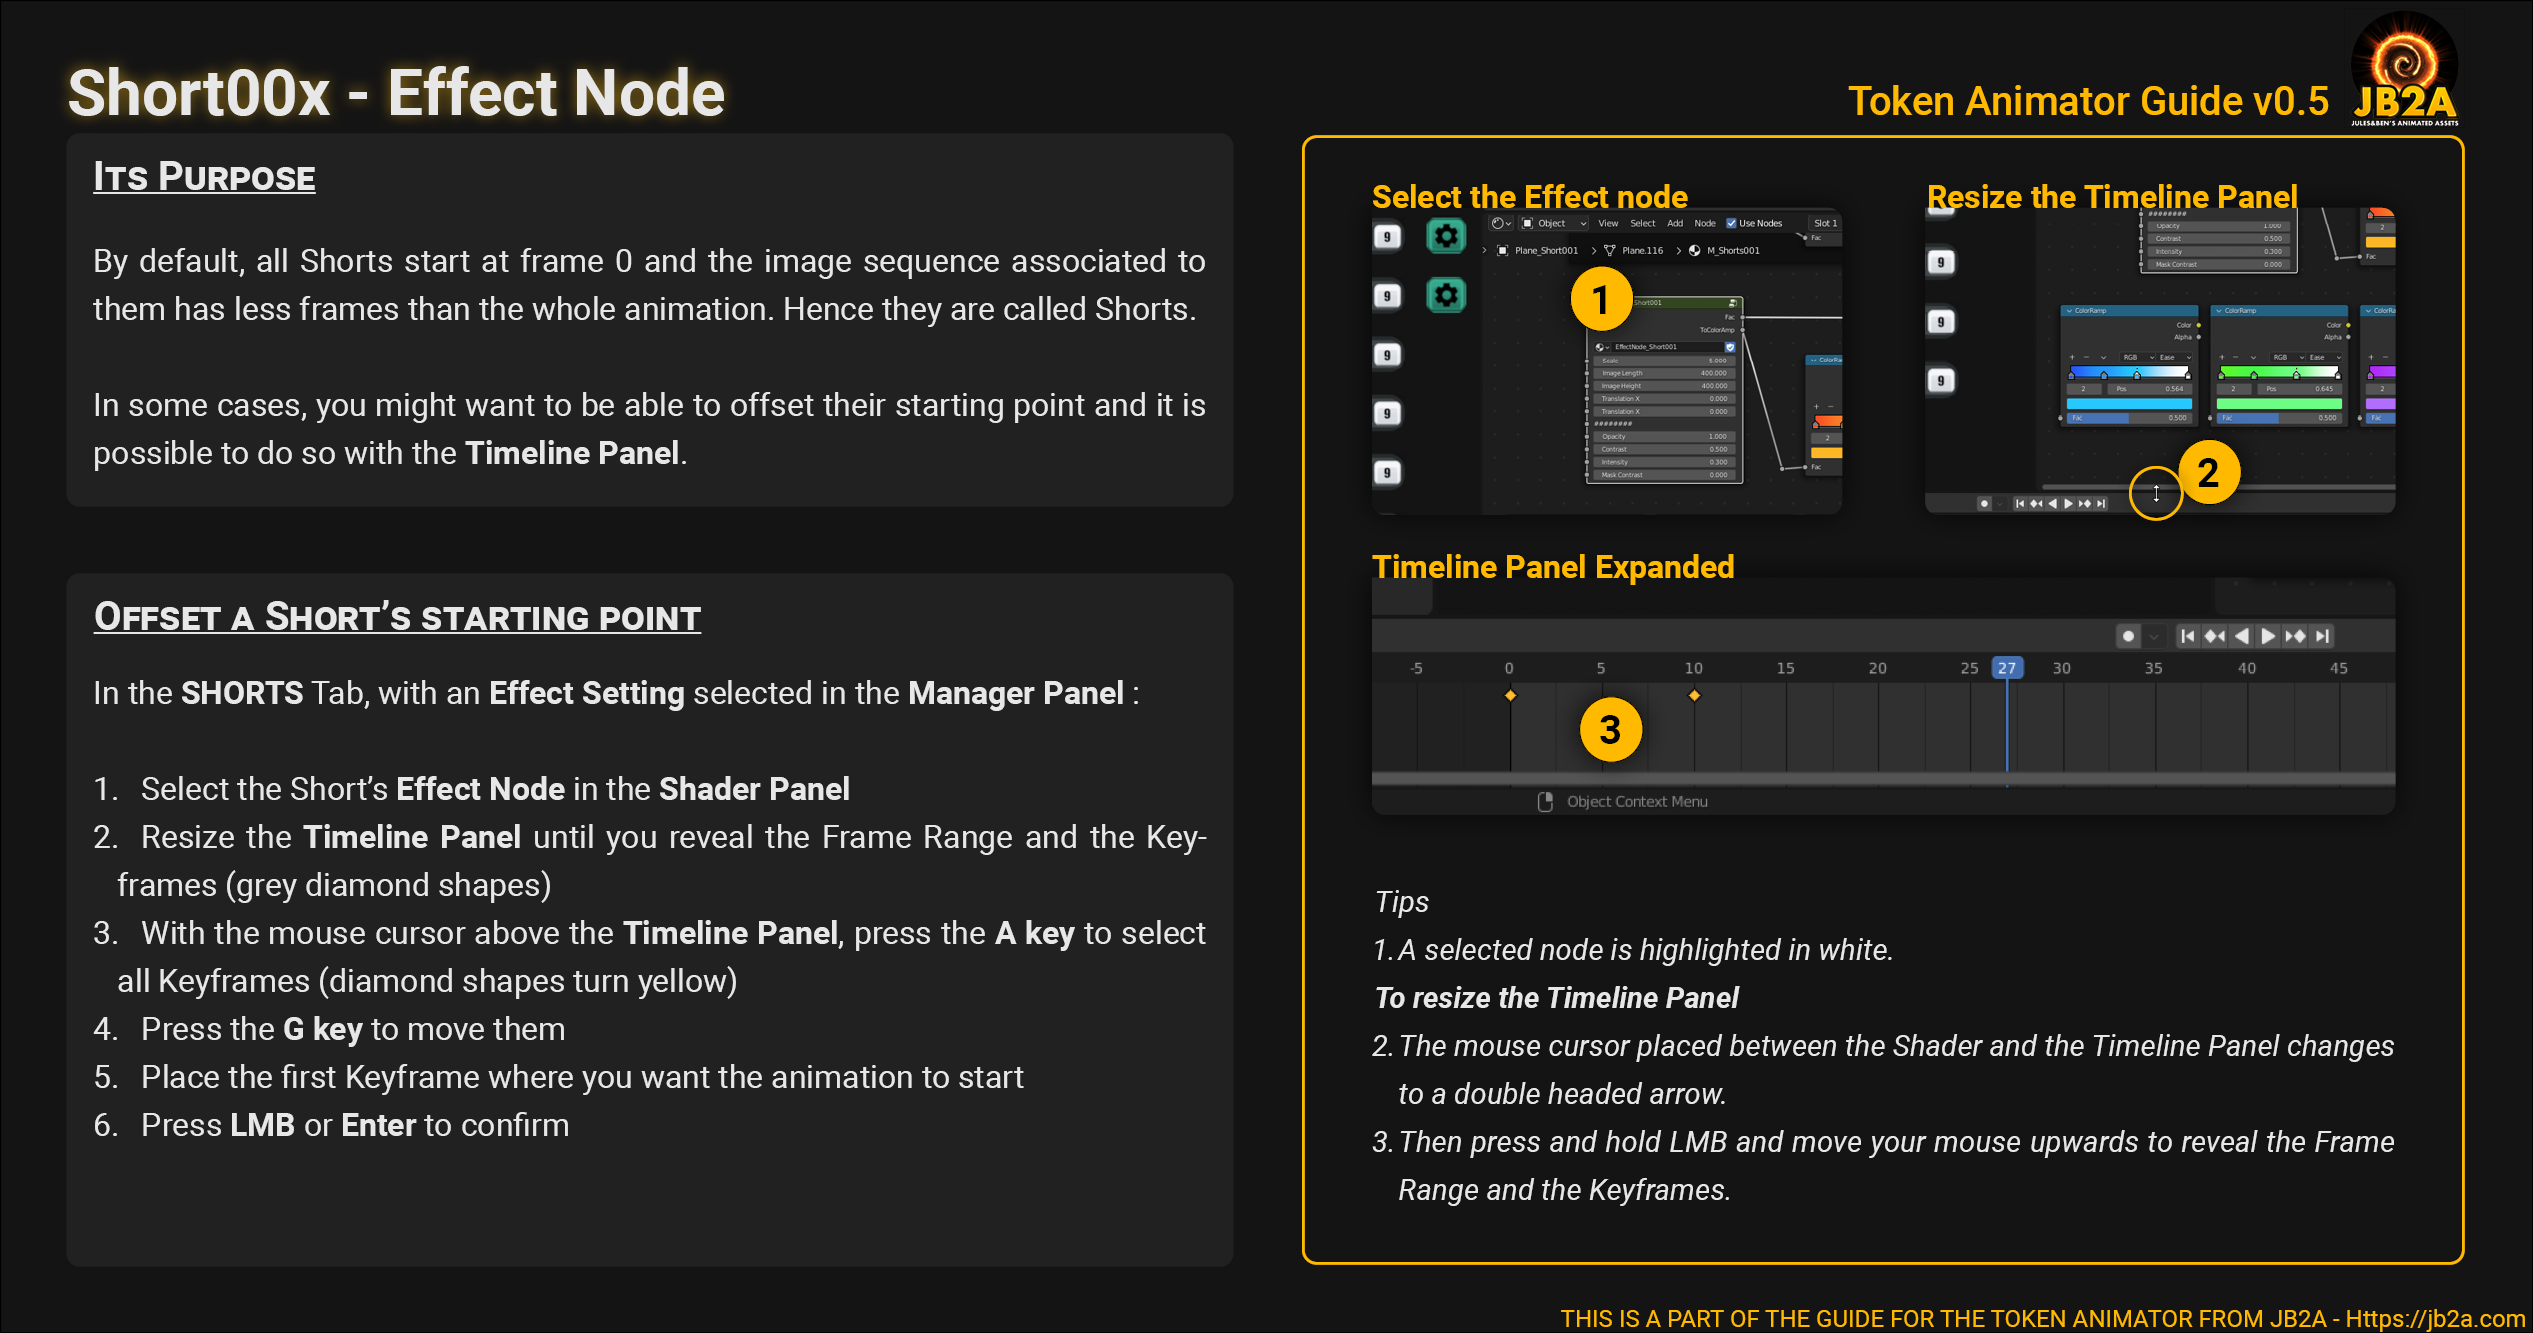
Timeline Panel
- Move your cursor until it reaches the separation between the Browser Panel and the Playback Panel.
- Your cursor should change to a “Two-side” arrow.
- Click and hold the Left Mouse Button then drag your mouse toward the top of your screen until the timeline appears.
- A light grey area going from frame 0 to frame 96 represent the timeline of the whole animation.
- To hide the panel, same principle but drag your mouse toward the bottom of your screen instead.
- On the timeline, you should see a blue Playhead. You can move it to see specific frame in the animation.
- To move the Play head, click and hold the Left Mouse Button on the playhead then use your mouse to drag it.
Shortcuts to remember :
- Spacebar to Platy/Pause the animation.
- Mouse Wheel to zomm in and out /scale the timeline.
- Middle Mouse Button to pan left or right.
- Home Key to frame the timeline.
- Left or Right Arrow to move the Playhead 1 frame .
- SHIFT + Left or Right Arrow to move Playhead at the start or at the end of the timeline.
Setting up the file and Workflow
Back up the file
I recommend not skipping this step. You’ll be able to start from a pristine file if something goes wrong with your project. And you won’t have to redownload the project.
Two ways to do it :
- With your operating system browser, copy/paste the *.blend file to make a duplicate of the file.
- Inside Blender, Go the the File menu and Save As a new file in the same folder (as bkp for example).
Blender's Browser and Relative Paths
//Previews\Pngs\
//Previews\Borders\
//Previews\Shorts\
//Previews\Rings\
//Previews\Particles\
//Previews\Stages\
//Previews\StagesAnim\
Workflow to follow
- Open the Token Animator file,
- Save your project as a new file and name it (your token name for example).
- Then start to create animated token
Token Animator Guide
Artwork
PNG
Border
Short
Ring
Particle
Stage
Stage Anim
If you’re not interested by the content of a tab you can skip it, you don’t have to follow a particular order with the tabs. You don’t need to use every single tab to create your animated token.
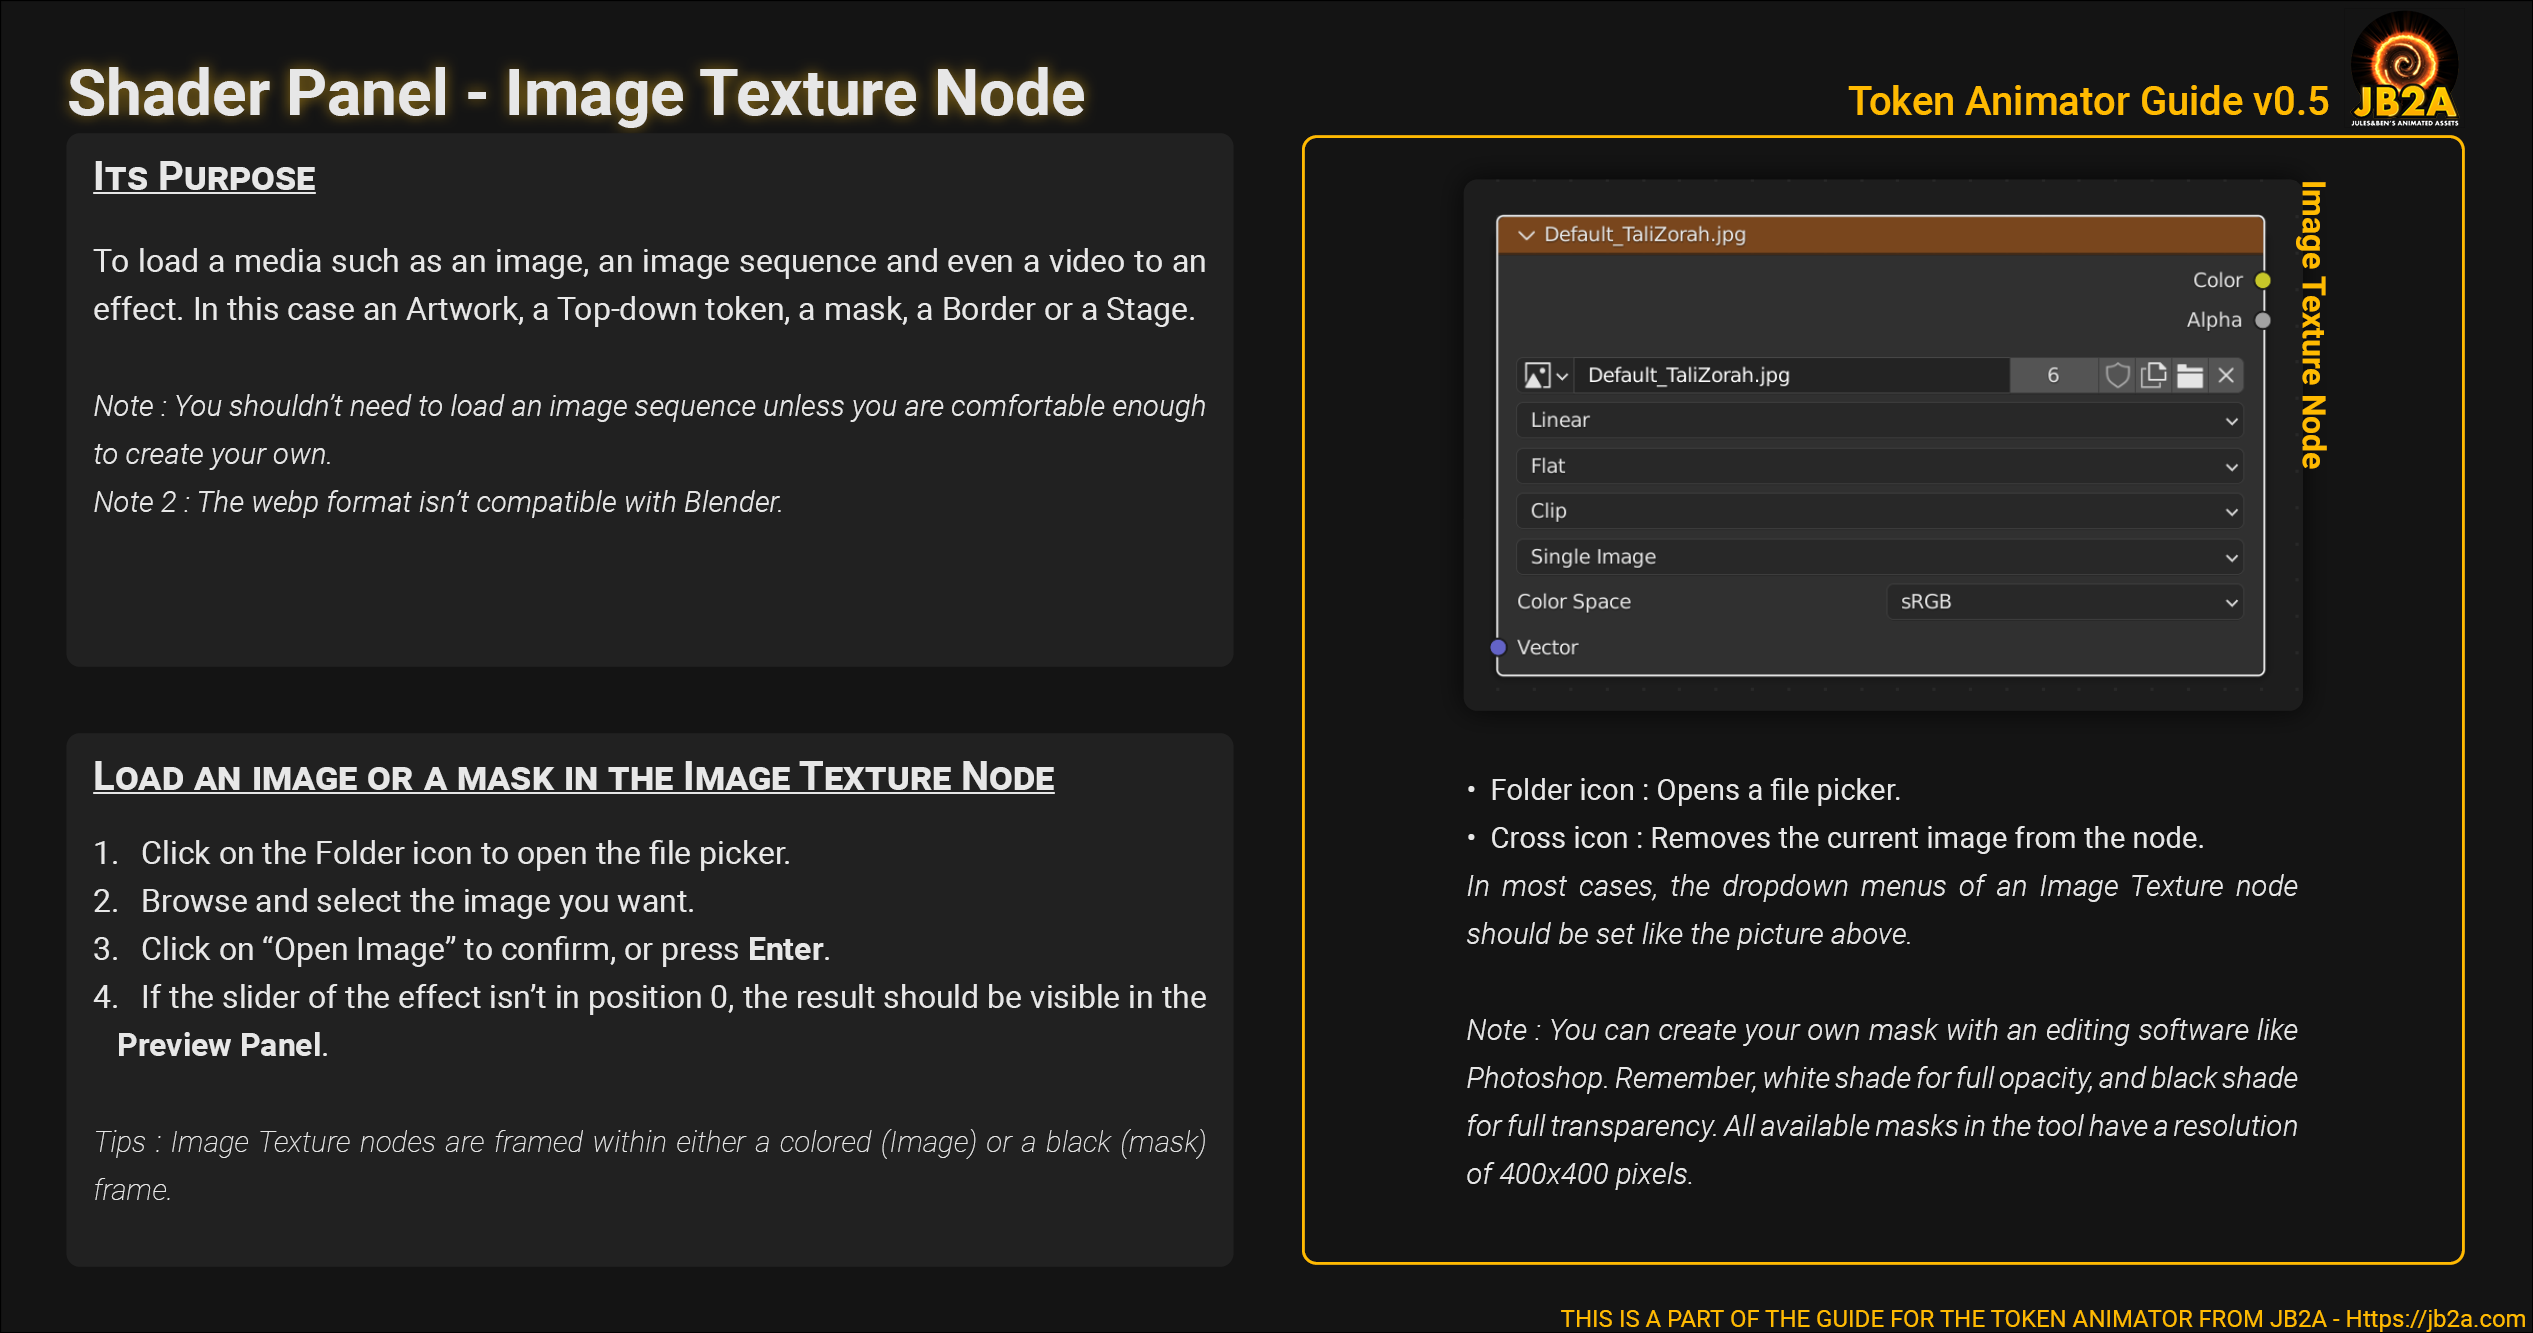
Load your Artwork
How to load a POG or a Top-down Token
Note : Blender doesn’t support the Webp format.
PNGs Tab
How to add an animated PNG
Borders Tab
How to add a Border
Shorts Tab
How to add a Short Effect
Rings Tab
How to add a Ring Effect
Particles Tab
How to add a Particle Effect
Stages Tab
How to add a Stage
Stage Anims Tab
How to add a animated effect for Stages
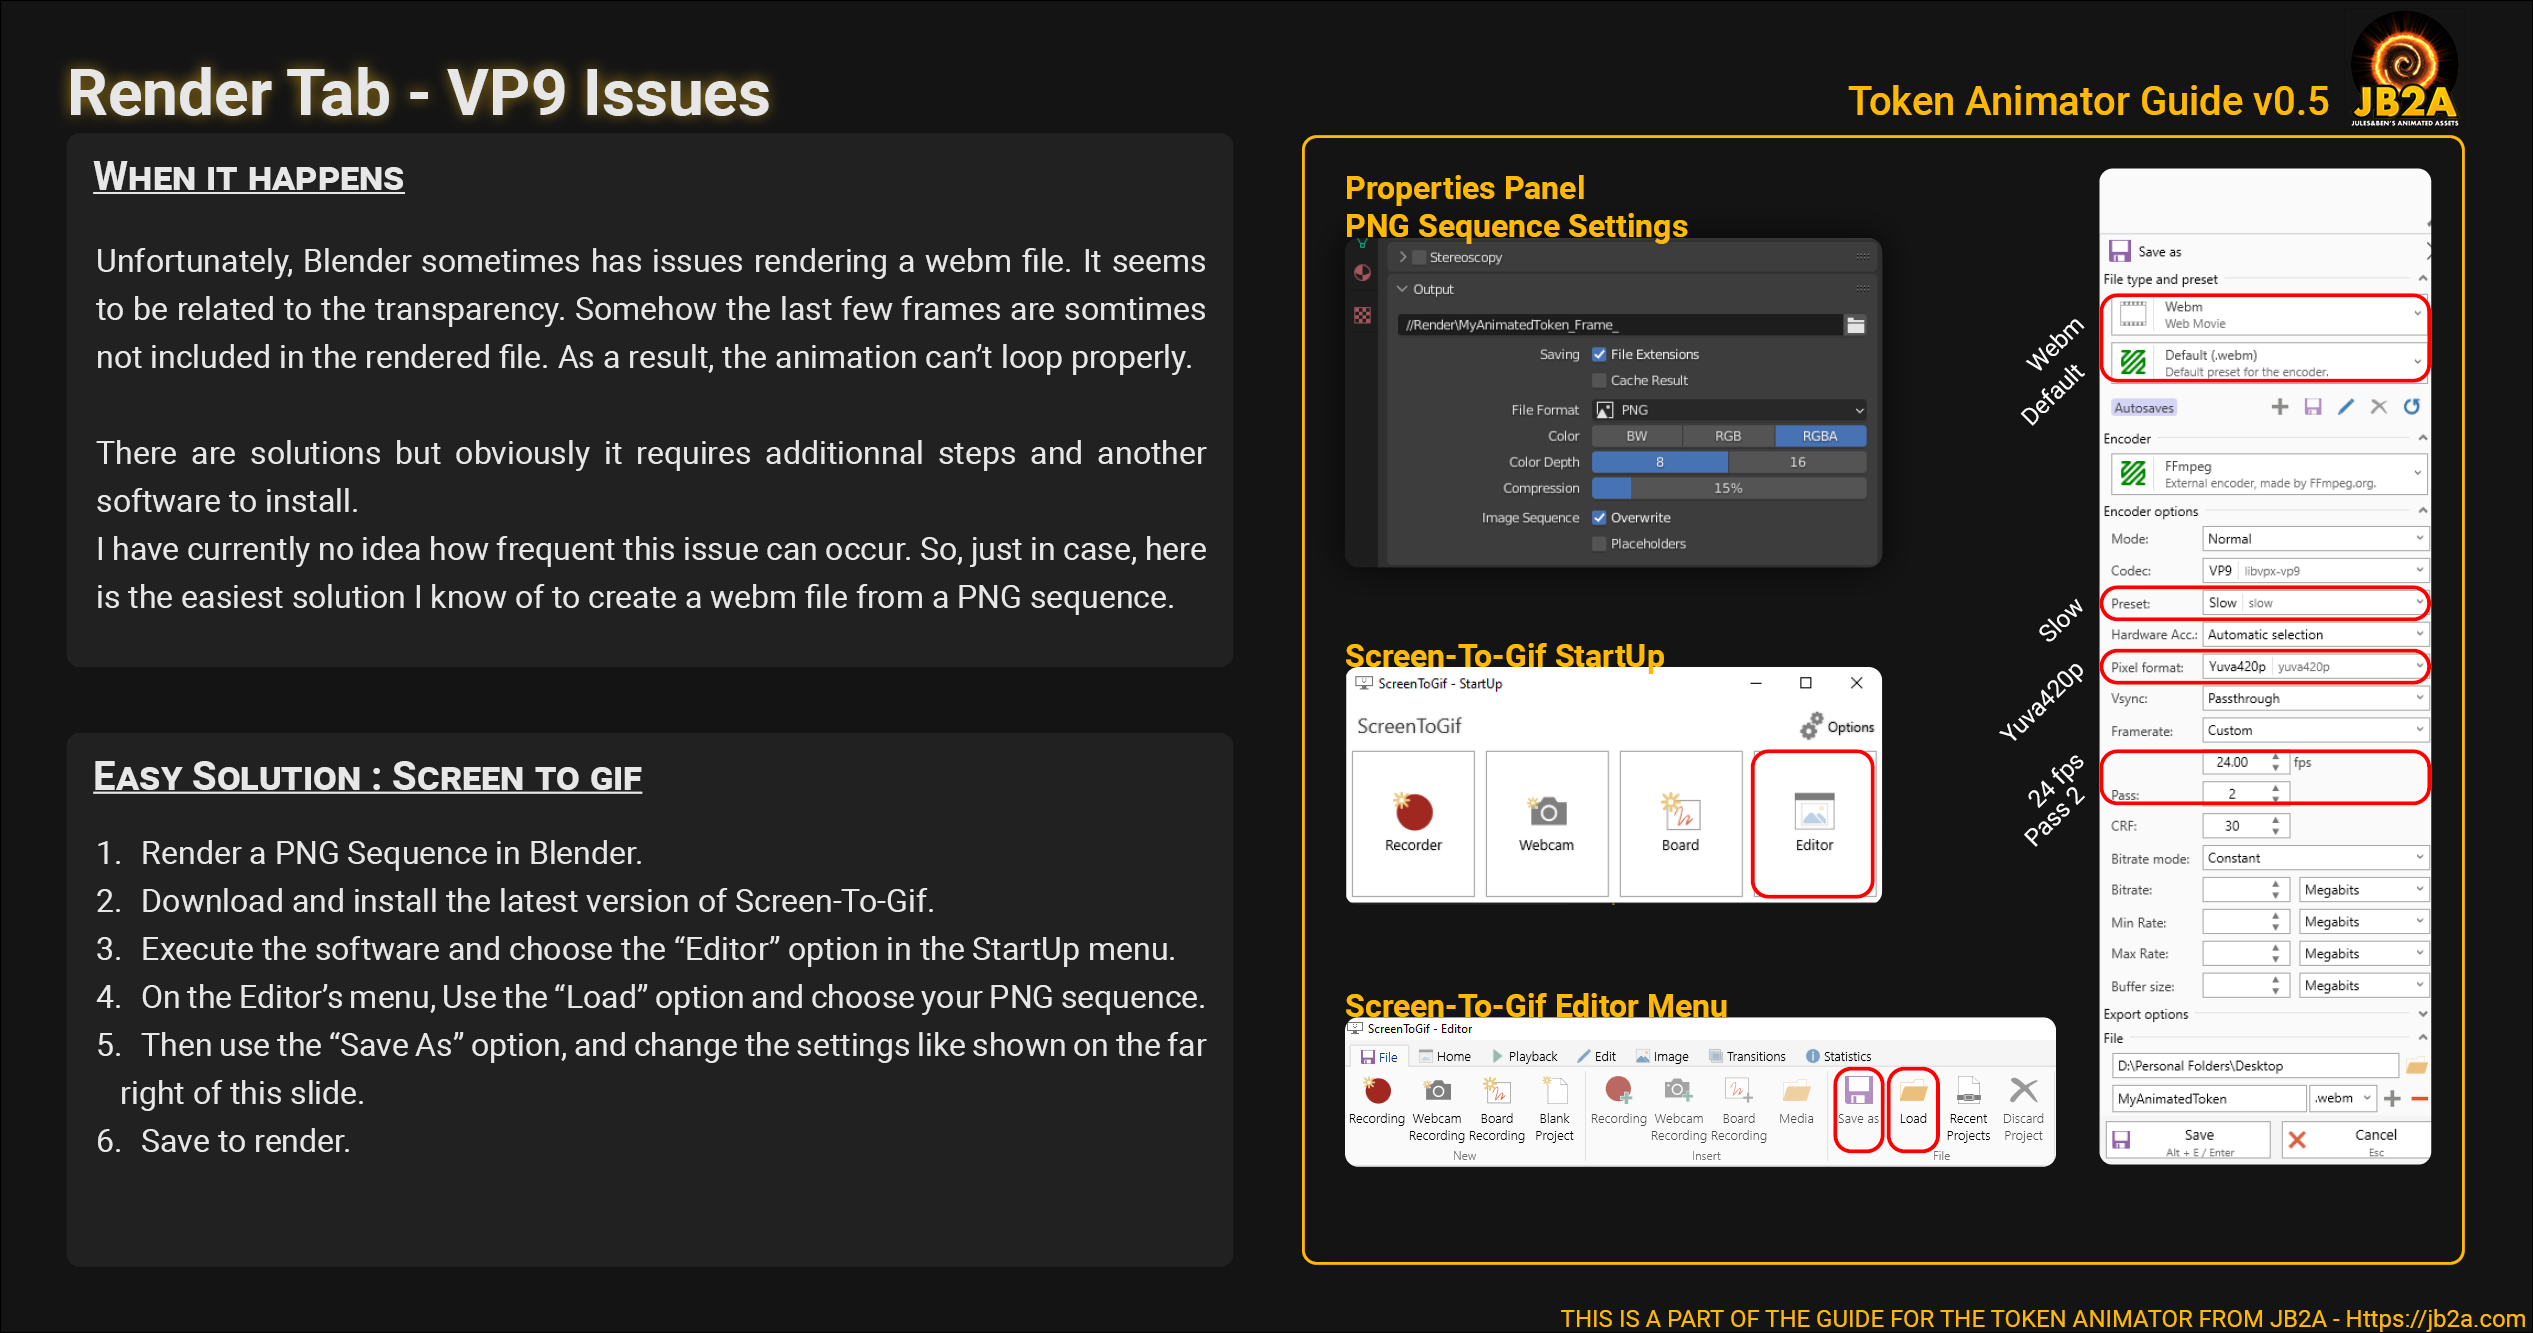
Render Tab
Rendering your animation
Full Video Demo
It also illustrates that from the moment you understand the workflow, you can create an animated token quite rapidly.
Tips, Tricks and nodes
Work in Progress
Links
F.A.Q
General
Warning: Undefined array key "toggle_icon_position" in /home4/jfrot/public_html/wp-content/plugins/master-addons/addons/ma-accordion/ma-accordion.php on line 875
Warning: Undefined array key "toggle_icon_position" in /home4/jfrot/public_html/wp-content/plugins/master-addons/addons/ma-accordion/ma-accordion.php on line 962
Preview Panel
Warning: Undefined array key "toggle_icon_position" in /home4/jfrot/public_html/wp-content/plugins/master-addons/addons/ma-accordion/ma-accordion.php on line 875
Warning: Undefined array key "toggle_icon_position" in /home4/jfrot/public_html/wp-content/plugins/master-addons/addons/ma-accordion/ma-accordion.php on line 962
Manager Panel
Warning: Undefined array key "toggle_icon_position" in /home4/jfrot/public_html/wp-content/plugins/master-addons/addons/ma-accordion/ma-accordion.php on line 875
Warning: Undefined array key "toggle_icon_position" in /home4/jfrot/public_html/wp-content/plugins/master-addons/addons/ma-accordion/ma-accordion.php on line 962
- Mouse Wheel to zoom in or out the view. To locate the corresponding Manager Panel.
- CTRL + Middle Mouse Button to pan the view. To center the Manager Panel.
Warning: Undefined array key "toggle_icon_position" in /home4/jfrot/public_html/wp-content/plugins/master-addons/addons/ma-accordion/ma-accordion.php on line 875
Warning: Undefined array key "toggle_icon_position" in /home4/jfrot/public_html/wp-content/plugins/master-addons/addons/ma-accordion/ma-accordion.php on line 962
Shader Panel
Warning: Undefined array key "toggle_icon_position" in /home4/jfrot/public_html/wp-content/plugins/master-addons/addons/ma-accordion/ma-accordion.php on line 875
Warning: Undefined array key "toggle_icon_position" in /home4/jfrot/public_html/wp-content/plugins/master-addons/addons/ma-accordion/ma-accordion.php on line 962
Render Panel
Warning: Undefined array key "toggle_icon_position" in /home4/jfrot/public_html/wp-content/plugins/master-addons/addons/ma-accordion/ma-accordion.php on line 875
Warning: Undefined array key "toggle_icon_position" in /home4/jfrot/public_html/wp-content/plugins/master-addons/addons/ma-accordion/ma-accordion.php on line 962
License
Exceptions
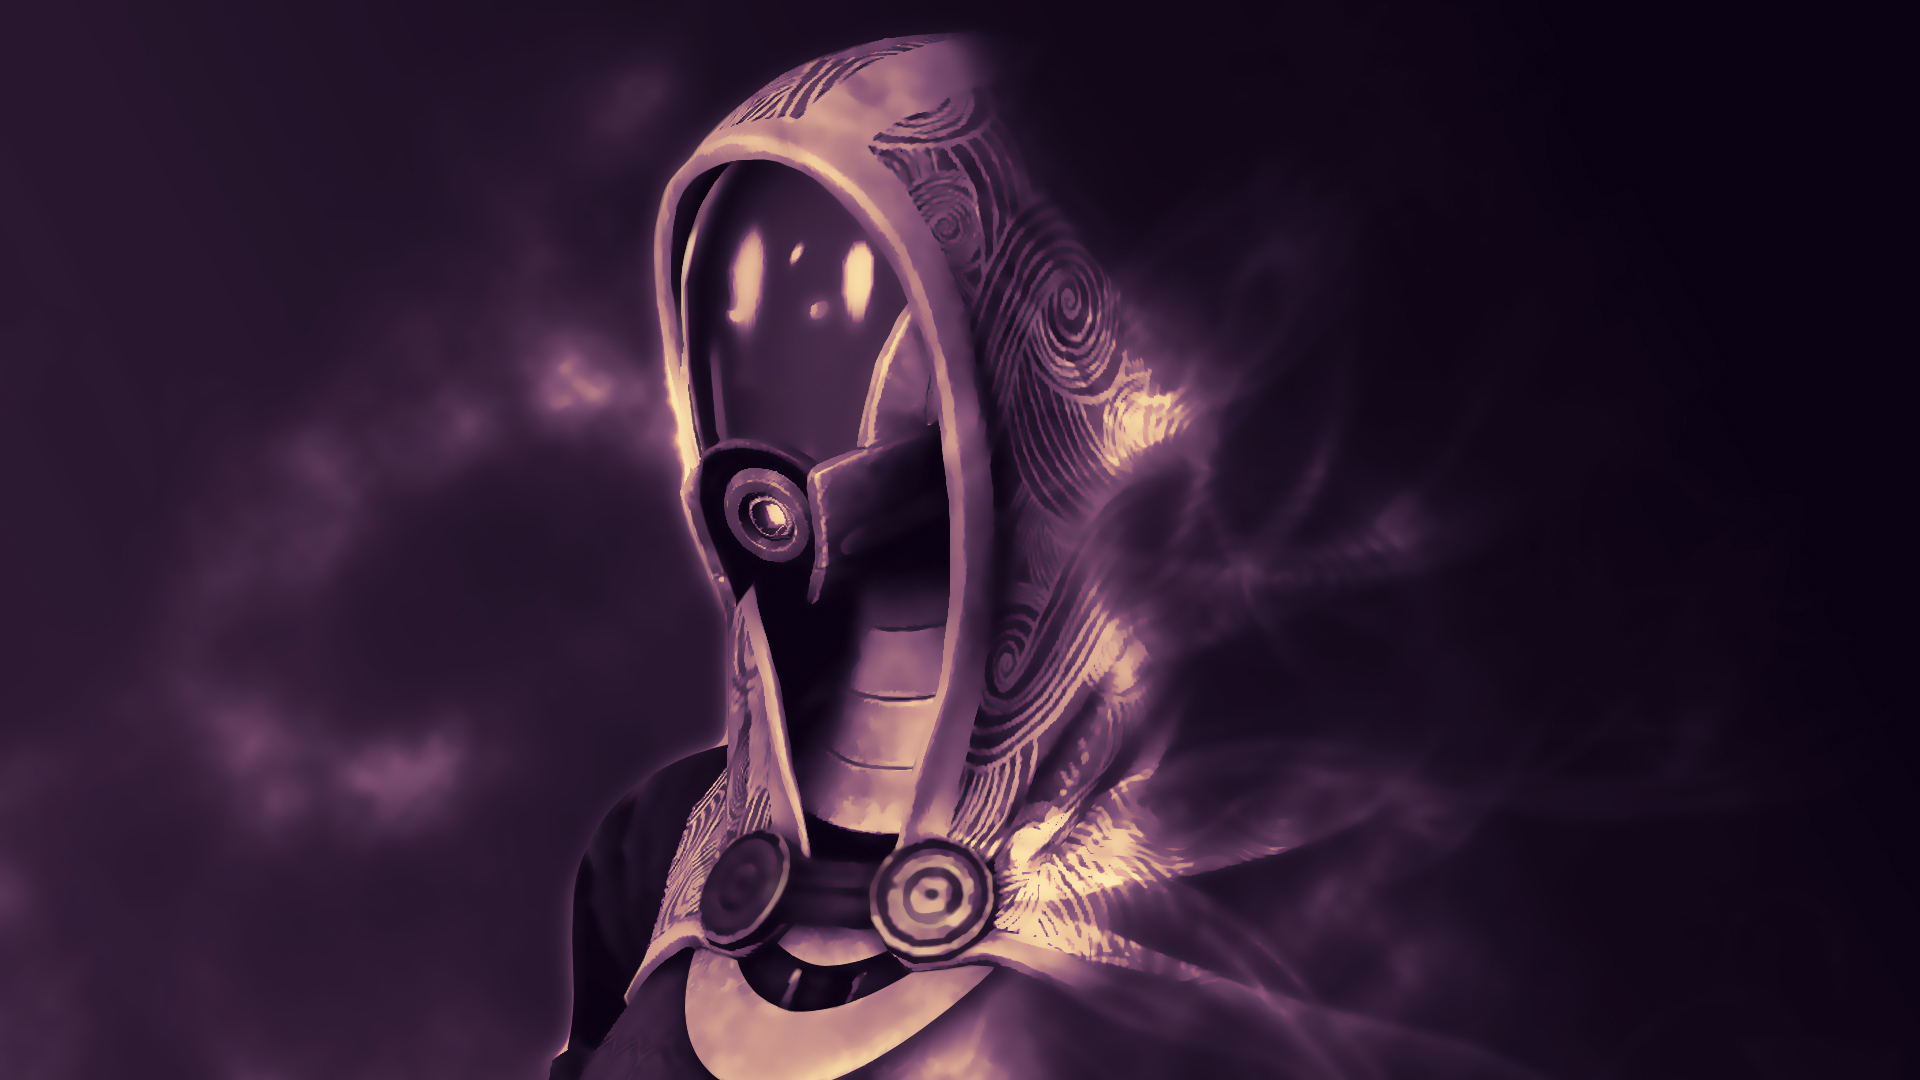
Tali Zorah Wallpaper from Stealthero on DeviantArt.
In the folder UI inside the project. Sliders and Buttons for Effect Settings are from Wenrexa
